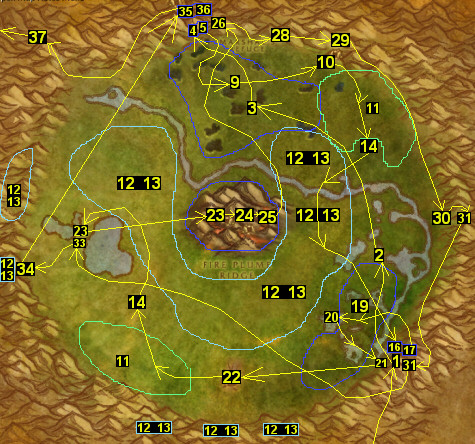
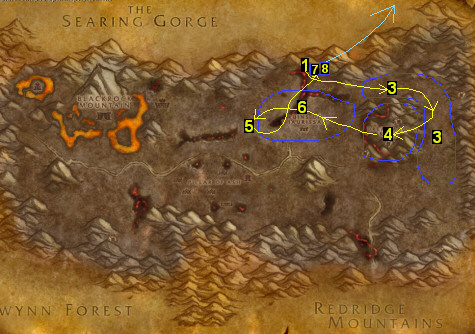
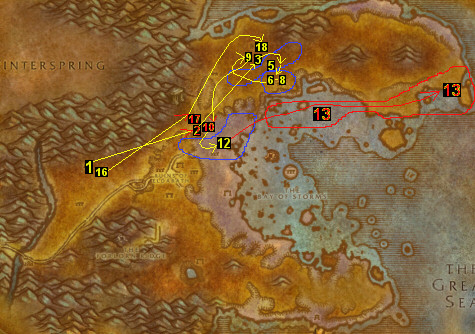
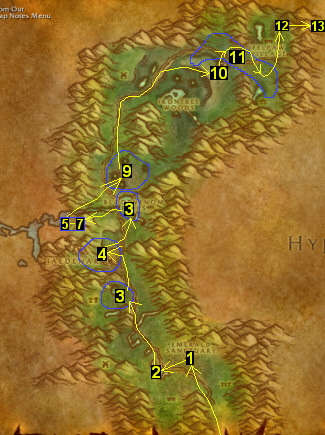
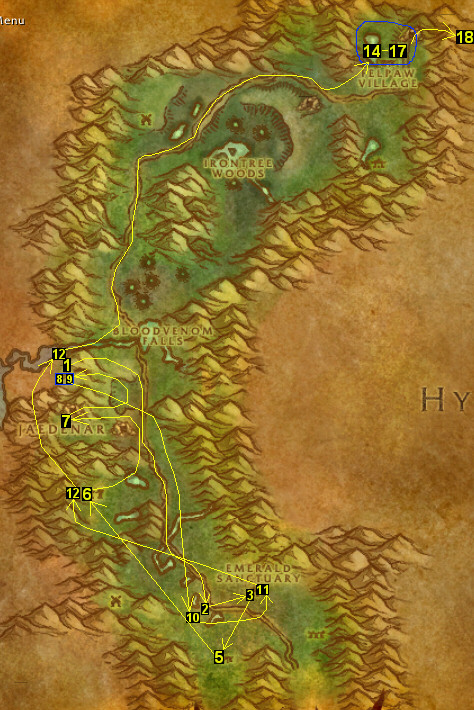
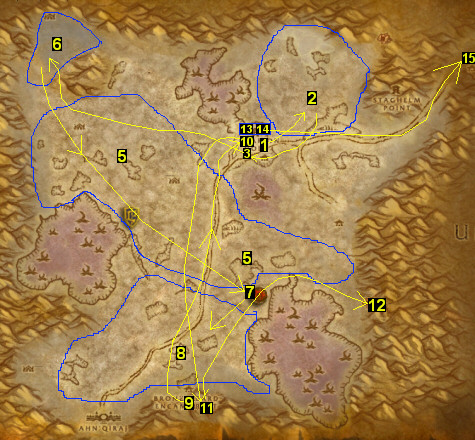
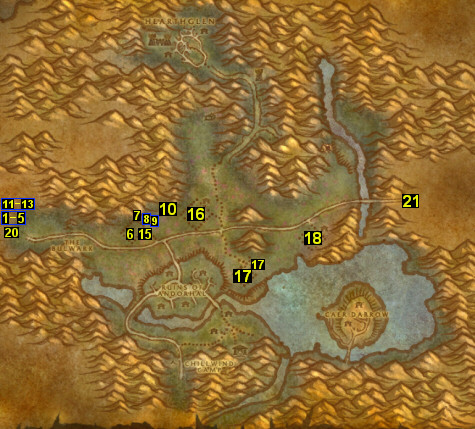
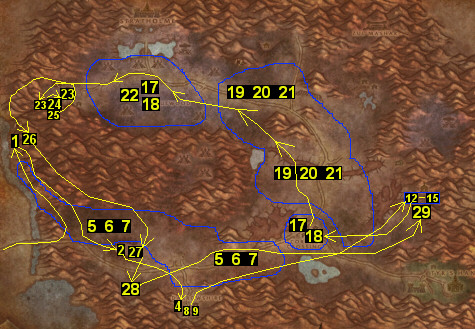
***Joana/Mancow's Leveling guide for Horde***


NOTE: that this is what I do to level, I do some stuff that some of you may think like, "what?, what about Hillsbrad?", yes I skip most of Hillsbrad, but this is just part of how I level. And also, I mainly solo the whole game, when I'm playing on new servers, I can't group with anybody cause I'm always like 10 levels above everybody else, so I have to solo everything, but I will also explain stuff you can do with groups. Before I get started on my leveling pattern, I'm gonna start to say how I came up with my pattern.


The first time I went through the game, I attempted virtually EVERY quest, by doing this I learned what quests are worth doing, and which quests should be avoided (because some quests are not good enough for the time/XP reward, and some quests are just down right too hard to solo at certain levels. How did I find out about all the quests? Easy, websites such as Thottbot.com and wow.allakhazam.com show you EVERY quest in the game, and give huge amounts of detail about where all the quest mobs/items are at, and how much the XP reward is for it and everything. And the first time I went through the game I read EVERY quest description and took my time REAL slowly, learning everything I can about the game, I tried every profession, I did every instance like at least 5 times, and (with my dedication) I studied websites on every instance, about the loot from the mobs, all the quests for them, and the correct way to do each one. As I played through the game the first time I constantly pressed "M" key to see the map to see where I was, so I can memorize the game world and where everything is at exactly (heck I still do that now!).  This guide has only been in my head, until now. This quest pattern in my opinion is VERY accurate and will show people the fastest way to do most of all the Horde quests in the game in the least amount of time and will give other hints on how to do them too.  This is the same questing pattern I used to get 4 days 20 hours /played time to 60 on a new server, and has even been revised for the better!


Also the quest patterns are pretty much the same no matter what class you choose (except you have to do your class's quests which aren�t a whole lot). I'm going to give my quest patterns starting with a hunter in Durotar.


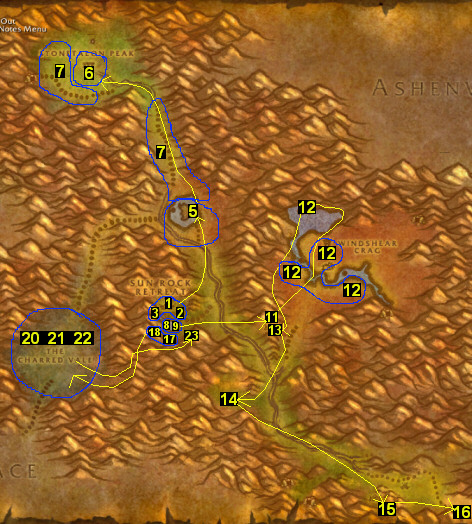
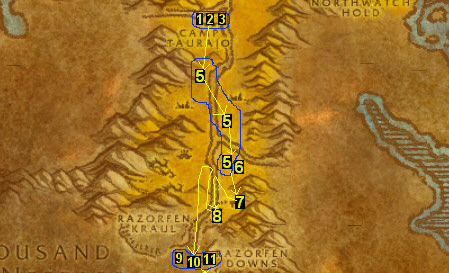
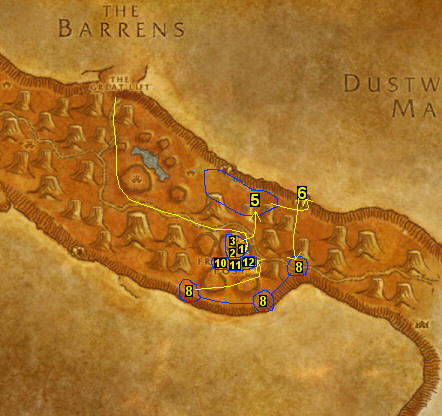
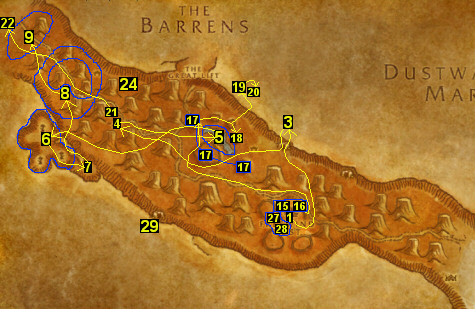
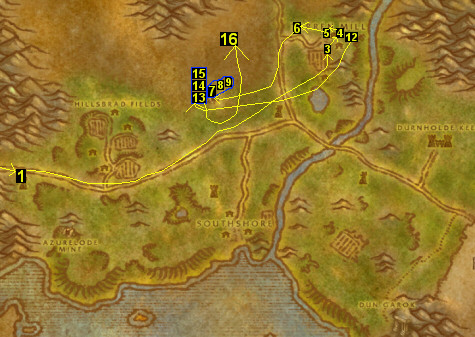
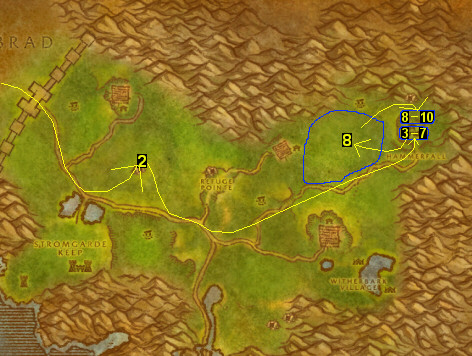
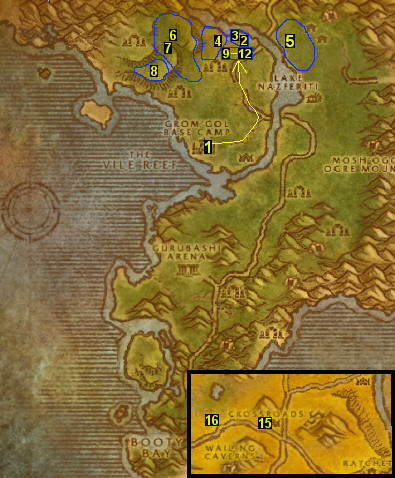
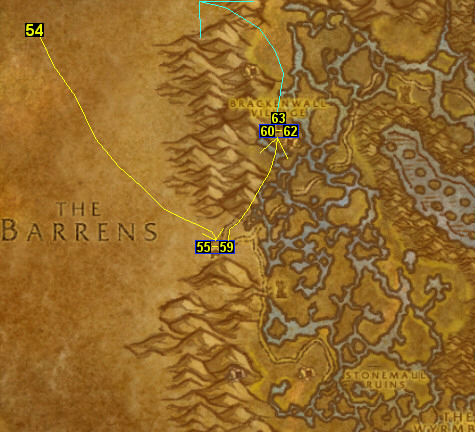
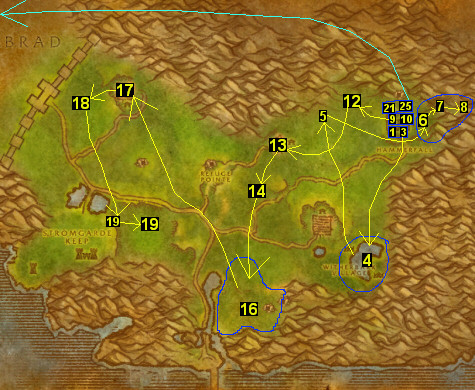
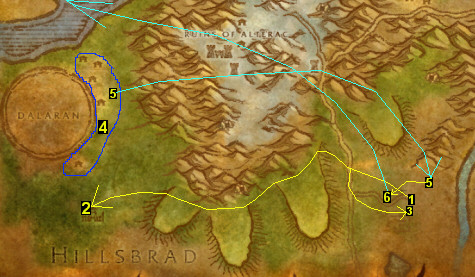
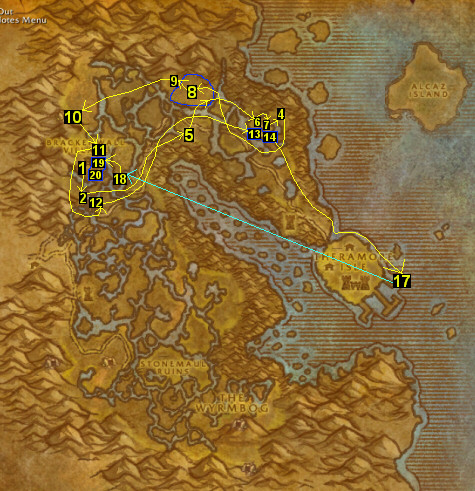
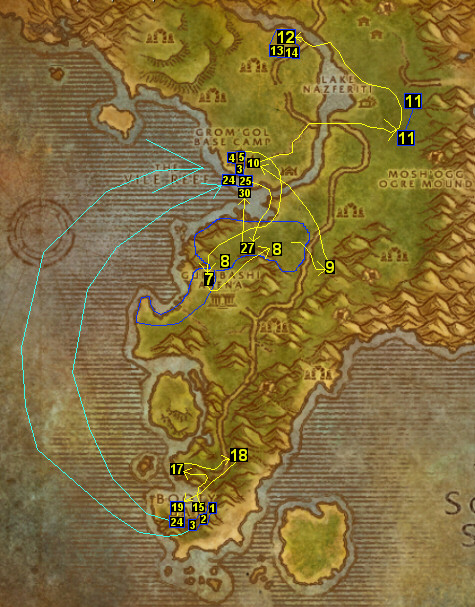
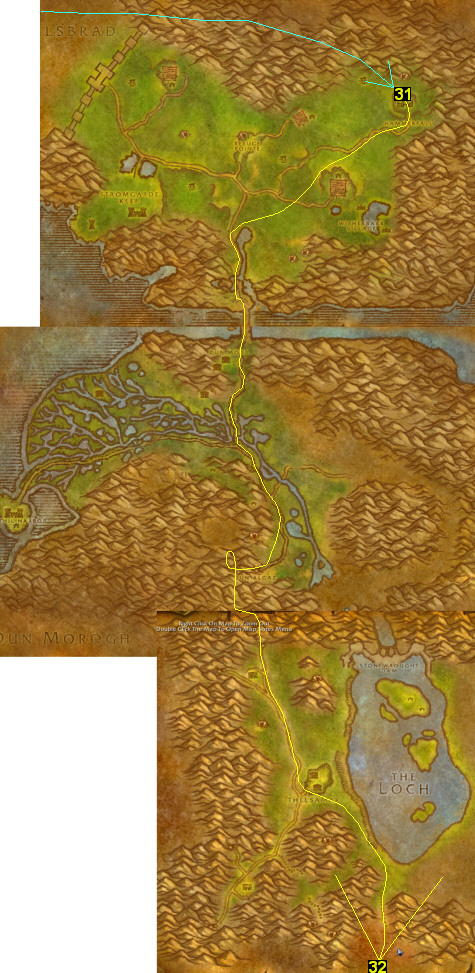
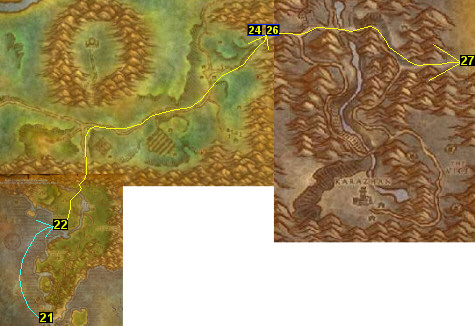
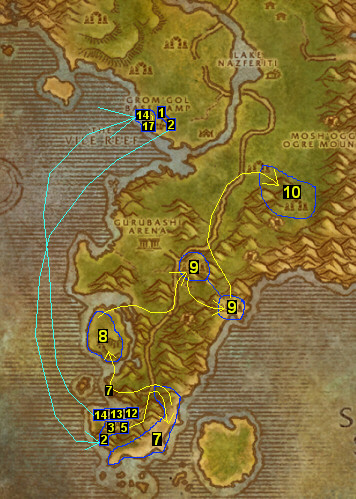
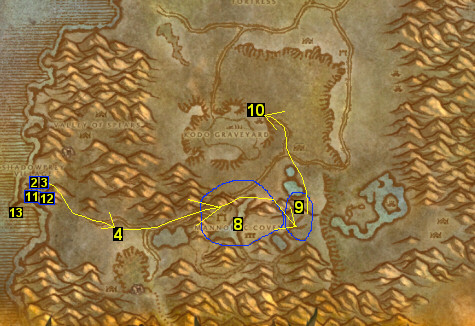
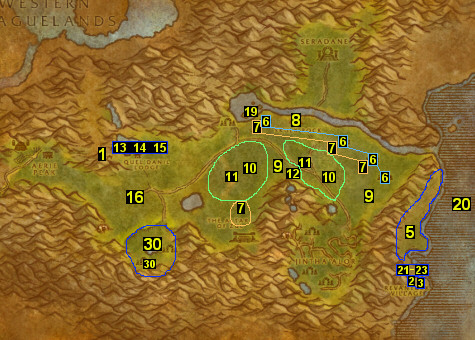
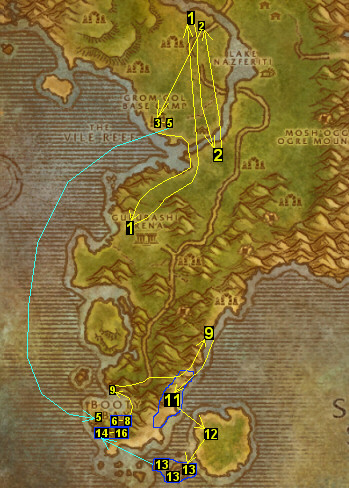
If you come across any quest that you don't know where or how to do it, simply look it up at either wow.allakhazam.com or Thottbot.com, they will tell you everything about the quest.  If you are confused as to where the specific zones are at, then this map should help you find them.


PLEASE READ! (HOW TO USE THIS GUIDE):  All quests and mob links are colored in BLUE.  All quests are linked to both Thottbot and Allakhazam, you can see this by the last two letters in each quest link will take you to Thottbot instead of Allakhazam.


ABOUT THE VIDEOS: All video links are in RED, All videos are linked to both Stage6 and Google Video. Now keep in mind Stage6 has MUCH higher video quality than Google video. Always try Stage6 first, if there is a problem with Stage6 (Sometimes Stage6 can take a bit longer to load the videos, however most of the time Stage6 will work really fast and efficient, Stage6 is going through an Alpha phase at the time of this writing, so you may experience some slow downs or issues from time to time, that is why I provide a mirror link (Google video), use Google video only if you have problems with Stage6. All these videos were recorded in Divx, Stage6 only shows Divx videos, so again it has MUCH higher quality for my videos, Google Video takes the quality away from my videos big time. The last letter in each short video link will take you to Google video instead. Mirrors are provided if there is an issue with one of the links. This video was recorded on Jubei'Thos server, and shows me going from 1-60 in 4 days 20 hours /played time, and first to 60 on that server! Make sure you go to Divx.com and download and install the latest Divx codec so you can view my videos properly.


Keep in mind the text guide is actually more up to date than the video its self. I have a few slightly modified questing patterns in the text guide that don't match the video, the ones in the text are more accurate.


HUNTER ONLY PARTS: All text colored in MAROON are hunter specific ONLY.


NOTE: Please refer to the end of the guide for regular tips and tricks that will help you level faster!


If you have any questions or comments on anything, you can contact me here:    You can also visit my website:  WWW.JOANASWORLD.COM


World of Warcraft�
World of Warcraft and Blizzard Entertainment are trademarks or registered trademarks of Blizzard Entertainment, Inc. in the U.S. and/or other countries.


If you are interested in making money referring people to buy my guide, you can follow the instructions on THIS PAGE HERE about how to do this, generally with my affiliate program you earn 50% of all the profit if you refer somebody to my site with your affiliate link that buys my guide!  TALK ABOUT EASY MONEY!


Copyright 2006

Here's my basic leveling pattern:


LVL - Area


1-12   Durotar

12-15 Barrens

15-16 Stonetalon

16-20 Barrens

20-21 Stonetalon Mountains

21-22 Ashenvale

22-23 Southern Barrens

23-25 Stonetalon

25-25 Southern Barrens

25-26 Thousand Needles

26-27 Ashenvale

27-27 Stonetalon Mountains

27-29 Thousand Needles

29-30 Hillsbrad Foothills

30-30 Alterac Mountains

30-30 Arathi Highlands

30-31 Stranglethorn Vale

31-32 Thousand needles (Shimmering Flats)

32-34 Desolace

34-35 Stranglethorn Vale

35-37 Arathi Highlands

37-37 Alteric Mountains

37-37 Thousand Needles

37-38 Dustwallow Marsh

38-40 Stranglethorn Vale

40-41 Badlands

41-42 Swamp of Sorrows

42-43 Stranglethorn Vale

43-43 Desolace

43-43 Dustwallow Marsh

43-44 Tanaris

44-46 Feralas

46-46 Azshara

46-47 Hinterlands

47-47 Stranglethorn Vale

47-48 Searing Gorge

48-48 Swamp of Sorrows

48-49 Feralas

49-50 Tanaris

50-50 Azshara

50-50 Hinterlands

50-51 Blasted Lands

51-52 Un'Goro Crater

52-53 Burning Steppes

53-54 Azshara

54-54 Felwood

54-55 Winterspring

55-55 Felwood

55-55 Silithus

55-56 Western Plaguelands

56-57 Eastern Plaguelands

57-58 Western Plaguelands

58-60 Winterspring


Now I�m going to break it down step by step exactly what quests I do, and whether I did any grinding or not.

Joana the Power Leveler

 Click Here for Undead or Tauren Starting Zones!

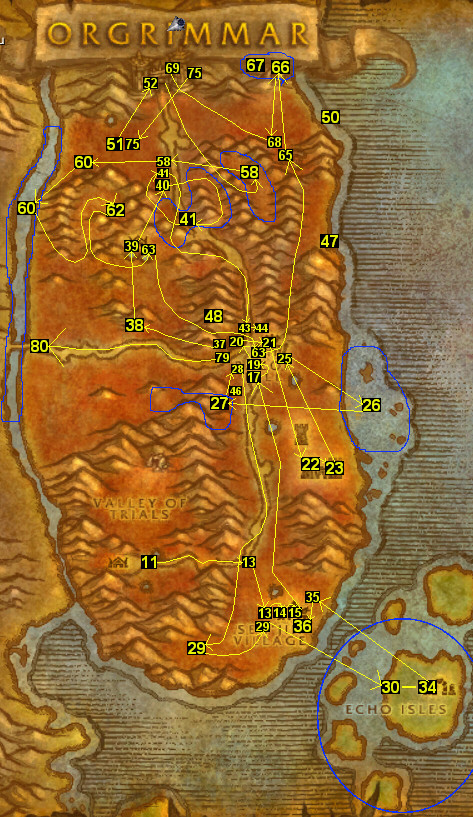
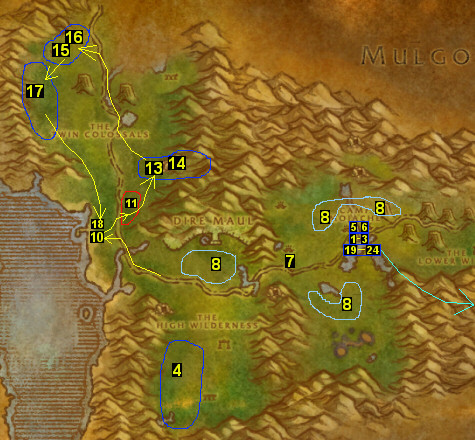
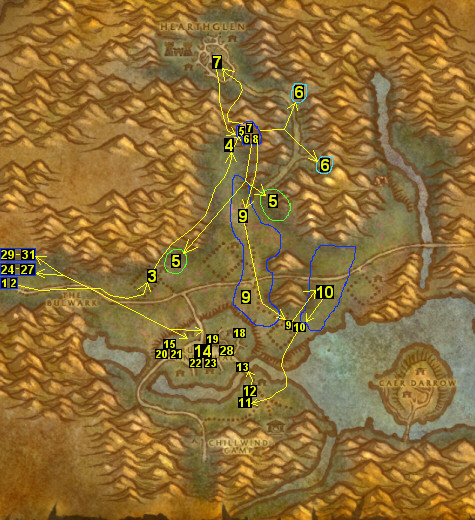
1-12   Durotar

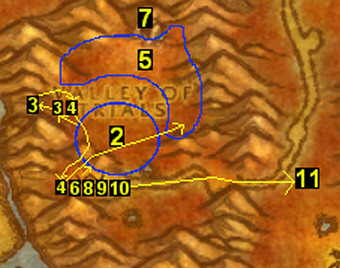
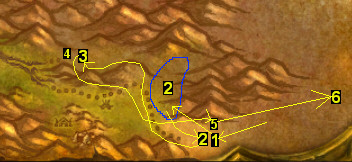
01) I do every single quest in Durotar! Here's the fastest way to do em:

02) Start off doing "Cutting Teeth"

03) Then once you hit level 2, go accept "Sarkoth" (at 40.62) and do "Sarkoth" (at 40.66).  Then turn it in and accept "Sarkoth" pt.2

04) Go turn in "Sarkoth" pt.2 and "Cutting Teeth" ... accept and do the following...

05) "Sting of the Scorpid"  "Vile Familiars"  "Galgar's Cactus Apple Surprise" and "Lazy Peons"

06) Turn those quests in, then accept and go do...

07) "Burning Blade Medallion" and "Thazz'ril's Pick"  (these are done in the cave at 44.56)

08) Once those two are done use your hearthstone.

09) Turn those quests in, then..

10) Accept "Report to Sen'jin Village"

11) Leave starting noob zone...

12) Run to Sen'jen Village, make sure you do these along the way:

13) Accept "A Peon's Burden" (52.68) and "Thwarting Kolkar Aggression" (54.75) along the way.

14) Go turn in "Report to Sen'jin Village" (55.74)

15) Then collect all the quests in Sen'jin Village.  (which include:  "A solvent Spirit" "Practical Prey" "Minshina's Skull" and "Zalazane")

16) Do NOT do "A solvent Spirit" at the water around Sen'jin Village.  Make sure the quest is accepted though.

17) Then run up to Razor Hill (52.44), grinding mobs along the way,

18) Make sure you get to level 6 before you get up there for new spells.

19) Collect all the quests at Razor Hill ("Vanquish the Betrayers", "Encroachment" "Break a Few Eggs" "Dark Storms" "Carry Your Weight" [get this at the watch tower north-west of Razor Hill])

20) Make Razor Hill your home.

21) Get first aid.

22) Then go do this: "Vanquish the Betrayers" along with "Carry Your Weight"  (these are done at Tiragarde Keep 57.55)

23) After killing Benedict (he is up in the building at 59.58) and get his key, go up the steps open the chest and grab the note that starts:

24) "The Admiral's Orders" accept the quest.

25) Go turn in "Vanquish the Betrayers" and "Carry Your Weight" at Razor Hill, then go do...

26) "A solvent Spirit" and "From The Wreckage...." Do these two quests at the water east of Tiragarde Keep (around 62.50).

27) Then do the first half of "Encroachment" (at 49.49).

28) Then if your not lvl 8, grind till you are, go turn in "From The Wreckage...." at Razor Hill and get new spells/abilities.

29) Run way down south and do "Thwarting Kolkar Aggression" (at 48.79) then turn it in (at 54.75).

30) Then go to Echo Isles (the islands south-east of Durotar) and do all these quests:

31) "Break a Few Eggs"

32) "Practical Prey"

33) "Minshina's Skull"  (the skull is at 67.87)

34) "Zalazane" (Zalazane is at 67.86)  (See Video)

35) After completing all these quests, die on purpose, so you end up right at Sen'jin Village...

36) Turn in "Practical Prey" "Minshina's Skull" and "Zalazane".  Save the quest reward item "Faintly Glowing Skull" for a later quest called "Burning Shadows"

37) Hearth to Razor Hill.  Turn in "Break a Few Eggs"

38) Then do the second half of "Encroachment" (west of Razor Hill at 42.38)

39) Then go up and accept "Lost But Not Forgotten" at the little hut at 43.30

40) Then go up (grind mobs along the way) and accept  "Winds in the Desert" at the goblin, 46.22.

41) Then do "Winds in the Desert" then turn it in, accept  "Securing the Lines"

42) Grind mobs to lvl 10.

43) Go down to razor hill, turn in "Encroachment"

44) Get new spells/abilities.

45) Do all three pet quests "Taming the Beast":

46) Dire molted bore (south of razor hill)

47) Surf crawler (north east of razor hill at 58.30), DON'T go down to Senjen Village, it�s too far away.

48) Armored scorpid (north west of razor hill)

49) After completing all those, accept "Taming the Beast", then go way up north-east, at 57.16..

50) And tame an Encrusted Surf Crawler for your first real pet, you'll get Claw Rank2 right off the bat.

51) Then go way west (grinding mobs along the way) and accept "Need for a Cure" (at 41.18)

52) Go to Orgrimmar (at 45.11)

53) Turn in "Taming the Beast" at hunter trainer.  (69.15 in Orgrimmar)

54) Then turn in "The Admiral's Orders" in thrall's chamber (33.37)

55) Accept "Hidden Enemies" (Thrall gives it)

56) Go into Cleft of Shadow, accept "Finding the Antidote" (46.53)

57) Then go do:

58) "Securing the Lines" (at 53.23)  Then turn it in (at 46.22)

59) Then go do:

60) "Finding the Antidote" (the scorpids are all over the place) and "Lost But Not Forgotten" (at the river west of Durotar)

61) Then go do:

62) "Dark Storms"  (at 41.26)

63) Then turn in "Lost But Not Forgotten" (43.30) and "Dark Storms" (at Razor Hill)

64) Accept "Margoz"

65) Turn in "Margoz" (at 56.20) accept "Skull Rock"

66) Go do "Skull Rock" along with "Hidden Enemies" (at the cave 54.11)

67) If you can, try to kill Gazz'uz, he drops "Eye of Burning Shadow" item which starts "Burning Shadows" quest.  HINT: use the quest reward item Faintly Glowing Skull to help you kill him, he�s tough without it, also try to party up with somebody if you can. (See Video on how I killed Gazz'uz)

68) Turn in "Skull Rock" (56.20) accept "Neeru Fireblade"

69) Go to Orgrimmar

70) Turn in "Hidden Enemies" (33.37) accept the next part to "Hidden Enemies"

71) Go to Neeru Fireblade in Cleft of Shadows (49.50)

72) Turn in "Neeru Fireblade" and "Burning Shadows" accept "Ak'Zeloth"

73) Also keep talking to him to complete "Hidden Enemies"

74) Then go back to Thrall and turn in "Hidden Enemies" again. The 3rd part refers to RFC instance, which I skip.

75) Leave Orgrimmar, and turn in "Need for a Cure" (at 41.18)

76) Hearth to Razor Hill.

77) Build up first aid.

78) Get new spells/abilities.

79) Accept "Conscript of the Horde" (at 50.43 in Razor Hill)

80) Run west into the Barrens...


See Full Video:      High Quality  |  Low Quality     (Levels 1-6)
See Full Video:      High Quality  |  Low Quality  (Levels 6-12)
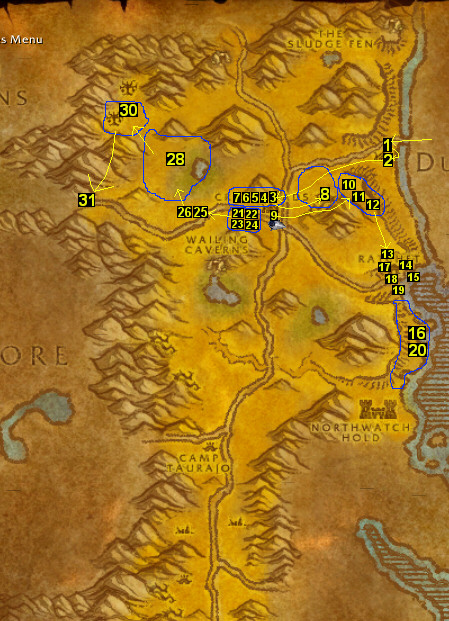
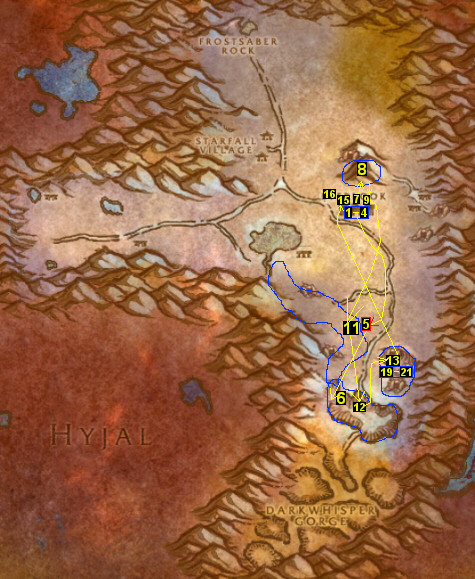
12-15 Barrens

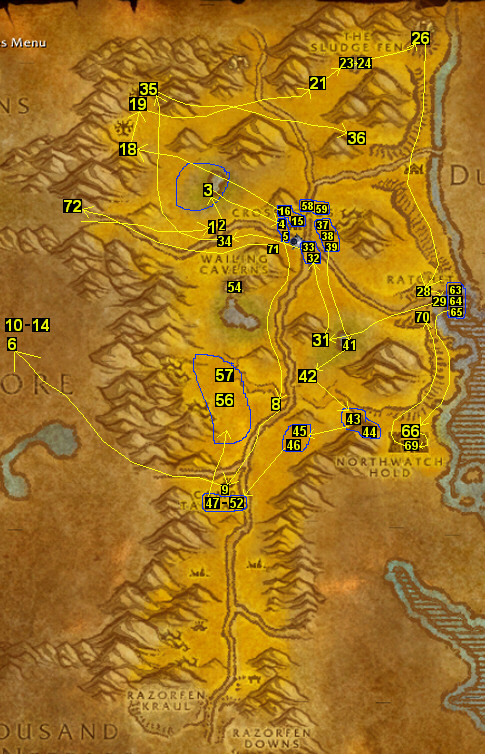
01) Turn in "Conscript of the Horde" accept "Crossroads Conscription"

02) Then turn in "Ak'Zeloth" I skip "The Demon Seed"

03) Run to XRs (Crossroads) (at 52.30)

04) While on my way to XRs, I  abandon my crab and tame a Savannah Huntress cat, for my new pet.

05) Once at XRs turn in "Crossroads Conscription" Then accept all quests in XRs (which includes: "Plainstrider Menace"The Forgotten Pools" "Raptor Thieves" "Wharfmaster Dizzywig" "Fungal Spores" "Disrupt the Attacks" "Supplies for the Crossroads" and "Harpy Raiders" on top of the watch tower)

06) Make XRs your home.

07) Get FP (Flight Path)

08) Then go do:  "Disrupt the Attacks" along with "Plainstrider Menace" and "Raptor Thieves" (at around 54.26)

09) Once "Disrupt the Attacks" is completed go turn it in and accept "The Disruption Ends"

10) Go do "The Disruption Ends" and "Supplies for the Crossroads" (at 56.26)

11) If you find "Chen's Empty Keg" accept it.

12) Once "Plainstrider Menace"  "The Disruption Ends" and  "Supplies for the Crossroads" are complete...

13) Go to Ratchet, get the Flight Path there and accept "Raptor Horns" "Samophlange"  "Southsea Freebooters"  "The Guns of Northwatch"

14) Grab the quest "WANTED: Baron Longshore" (the wanted sign by the bank)

15) Turn in "Wharfmaster Dizzywig" (goblin on the docks) accept "Miner's Fortune"

16) Then go do "Southsea Freebooters" along with "WANTED: Baron Longshore" (just south of Ratchet)

17) Turn those in, accept new ones, then go do:

18) "The Missing Shipment" (just turn this in at the goblin at the docks) accept "The Missing Shipment" part2

19) Run back, to Gazlowe, turn in "The Missing Shipment" part2 accept "Stolen Booty"

20) Then go do "Stolen Booty" (south of Ratchet again)

21) Once "Stolen Booty" is completed hearth to XRs. (don�t turn it in yet)

22) Turn in "The Disruption Ends" and "Supplies for the Crossroads", accept new quests...

23) Turn in "Plainstrider Menace" (It should be done by now) accept "The Zhevra"

24) At this point, I make sure I have three 6 slot bags, if I don't, I buy them at the bag vendor.

25) Run west from XRs, go to the guy in the hut... (at 45.28)

26) Accept: "Kolkar Leaders" and "Centaur Bracers"

27) Then go start doing:

28) "Kolkar Leaders" "Centaur Bracers" "Raptor Thieves" "The Zhevra" "Fungal Spores"  and  "The Forgotten Pools" (all of these are done just slightly north of where you are)

29) Once "Kolkar Leaders" is done.. (Barak is at 42.23)

30) Go do: "Harpy Raiders" (at 38.17)

31) Once "Harpy Raiders" is done, grind your way down into Stonetalon Mountains (at 34.28)...


See Full Video:      High Quality  |  Low Quality


15-16 Stonetalon Mountains

01) Accept "Goblin Invaders" and "Avenge My Village" (at 35.27 in the Barrens)

02) Go do: "Avenge My Village" then turn it in.

03) Then do: "Kill Grundig Darkcloud" (he is at 73.86)

04) NOTE: I skip the escort quest ("Protect Kaya"), It takes too long and it's too hard to solo.

05) Turn in "Kill Grundig Darkcloud" (at 35.27 in the Barrens)

06) Then go back to the Barrens..

See Full Video:      High Quality  |  Low Quality

16-20 Barrens

01) Grind your way back to the guy in the hut (at 45.28)

02) Turn in "Kolkar Leaders" accept "Verog the Dervish"

03) Make sure you finish up "Raptor Thieves" "The Zhevra" "Fungal Spores" and "The Forgotten Pools" before returning to the XRs.

04) Run to XRs (Cross Roads)

05) Turn in quests, grab new ones...

06) Then do "Apothecary Zamah" Which has you run all the way to Thunder Bluff (TB) (in Mulgore at 39.27) in the spirit rise cave. Do these along the way there:

07) Grind your way down south...

08) MAKE sure you do "Lost in Battle" (Manrik's Wife) along the way, She's laying dead by the hut, west of the bridge (at 49.50).

09) Accept "Tribes at War" (gnoll in the cage at 44.59), and get FP at Camp Taurajo (CT).

10) Once at TB, go to weapon master (40.62), get Guns and Staff skills. (I do this as a Hunter, get what weapon skills you need for your class)

11) Get new spells/abilities.

12) Turn in "Apothecary Zamah" the cave below the spirit rise (at 29.29).

13) Go to first aid guy at spirit rise to build up first aid.

14) Go up to the tower in middle of town to get FP, but DON'T fly back to XRs

15) Hearth back to XRs

16) Turn in "Lost in Battle"

17) Then go north west of XRs and do:

18) "Prowlers of the Barrens" (37.20)

19) Then "Harpy Lieutenants" (38.14)

20) Then grind your way east and do:

21) "Samophlange" (52.11) complete the whole chain, which in the end has you kill the goblin for the key. (See Video)

22) Then go east to Sludge Fen and do:

23) "Ignition" (56.8) Then do:

24) "The Escape" (See video on how I do Ignition and Escape)

25) Then go north-east and do:

26) "Miner's Fortune" (61.5)

27) Then grind your way south to Ratchet...

28) Turn in "Stolen Booty"  "Samophlange" "The Escape" ... SKIP "Wenikee Boltbucket"

29) Turn in "Miner's Fortune"

30) Then go west of ratchet and do:

31) "The Stagnant Oasis" "Verog the Dervish" (at 54.43)

32) Then run to XRs

33) Turn in "Prowlers of the Barrens" and "Harpy Lieutenants", accept new quests...

34) Go west of XRs, to turn in: "Centaur Bracers" and "Verog the Dervish" ... I SKIP "Hezrul Bloodmark"

35) Then grind your way north and do: "Serena Bloodfeather" (at 38.11)

36) Then go east (grind mobs along the way) then do "Echeyakee" (coords are at 55.17) (See Video)

37) Hearth to XRs.

38) Turn in "Echeyakee" ... accept "The Angry Scytheclaws"

39) Turn in "Serena Bloodfeather" accept "Letter to Jin'Zil".  Make sure that "Consumed by Hatred" is also accepted.

40) Go down south and do:

41) "Altered Beings"  (55.42)

42) "The Angry Scytheclaws"  (51.46)

43) "Raptor Horns" along with:

44) "Stolen Silver"  (at 57.54)  (See Video)

45) "Tribes at War" along with:

46) "Consumed by Hatred"  (at 51.54)

47) Then grind your way to Camp Taurajo (45.60)

48) Accept "Weapons of Choice"

49) Go to gnoll in the cage...

50) Turn in "Tribes at War" accept "Blood Shards of Agamaggan" and "Betrayal from Within"

51) Turn in "Blood Shards of Agamaggan"

52) Turn in 10 bloodshards for "Spirit of the Wind" (repeatable quest) for fast run speed.

53) At this point, you should be a 3rd way to level 20.

54) Now comes the fun part:  Wailing Caverns Instance! (at 46.36)

55) OPTIONAL: GRIND all the way to level 20! (which is what I do, but it's not recommended)

56) I grind away at beasts and brisstlebacks just north of CT.

57) Keep an eye out for the mob named Owatanka, he drops "Owatanka's Tailspike" which starts "Owatanka"

58) Once your about a bar away from 20, run to XRs...

59) Turn in "Stolen Silver" "Consumed by Hatred" "Altered Beings" and "The Angry Scytheclaws" ...accept all new quests.

60) Fly to Orgrimmar, get new spells/abilities.

61) Grab "The Ashenvale Hunt" quest

62) Hearth back to XRs.

63) Fly to Ratchet...

64) Accept "Ziz Fizziks"

65) Turn in "Raptor Horns" accept "Deepmoss Spider Eggs"

66) Then go do: "The Guns of Northwatch" (at 60.55)  (See complete video on how this quest along with the escort quest is done)

68) Then once "The Guns of Northwatch" is done, do:

69) "Free From the Hold" (escort quest)

70) Turn in both quests at Ratchet, then..

71) Hearth to XRs. (if hearth stone is still on a cooldown, fly to XRs)

72) Run into Stonetalon Mountains...


See Full Video:      High Quality  |  Low Quality


20-21 Stonetalon Mountains

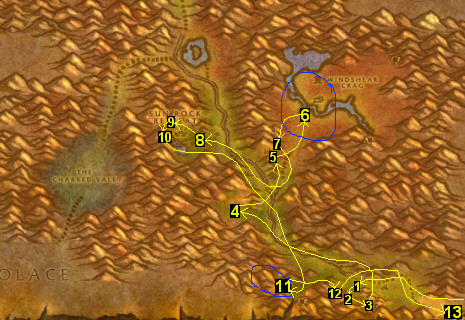
01) Run to Malaka'Jin...

02) Accept "Blood Feeders"  (at 71.95)

03) Turn in "Letter to Jin'Zil" (74.97 in the cave) ... accept "Jin'Zil's Forest Magic"

04) Go do: "Blood Feeders" and "Deepmoss Spider Eggs" (at 54.76)

05) Then turn in "Ziz Fizziks" (the goblin in the hut at Windshear Crag, 60.63) ... accept "Super Reaper 6000"

06) Then do: "Goblin Invaders" and "Super Reaper 6000" (the mobs are just north in Windshear Crag)

07) Then turn in "Super Reaper 6000" ... accept "Further Instructions"

08) Run to Sun Rock Retreat at 46.59.

09) Get FP there.

10) Run up the little pathway and accept "Boulderslide Ravine"

11) Then go do "Boulderslide Ravine" (at 61.92)

12) Then turn in "Blood Feeders" (71.95)

13) Then turn in "Goblin Invaders" (at 35.27 in the Barrens) ... accept "Shredding Machines" and "The Elder Crone"

14) Hearth to XRs.

15) Stable your pet.

16) Run north to Ashenvale (stopping along the way to turn in "Report to Kadrak" but SKIP "The Warsong Reports"


See Full Video:      High Quality  |  Low Quality

21-22 Ashenvale

01) As soon as you enter Ashenvale keep an eye out for a Ghostpaw Runner and tame it for Bite Rank3.

02) Run to Splintertree Post (at 73.65)

03) Turn in "The Ashenvale Hunt"

04) Get FP in Splintertree Post.

05) Run all the way to Zoram Strand (at 13.31), grind mobs along the way so you get the *Bite Rank3* ability before you get there.

06) Once you get *Bite Rank3*, abandon your wolf and Tame a Clattering Crawler at the Zoram Strand to get *Claw rank 3*

07) Get FP there.

08) Use that pet to Do the following quests:

09) "Naga at the Zoram Strand"

10) "Vorsha the Lasher" (See Video) (make sure your level 22 before doing this)  If you fail, you can come back later at Level 26 (around step 14) and try again.

11) Turn those quests in...

12) Hearth back to XRs, get cat back out (train your cat the new abilities).


See Full Video:      High Quality  |  Low Quality


22-23 Southern Barrens

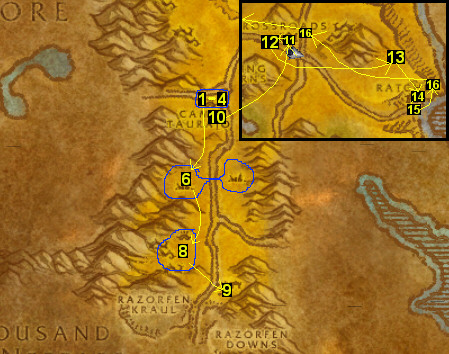
01) Fly to CT

02) Turn in "Jorn Skyseer" ... accept "Ishamuhale"

03) Make CT your home

04) I give bloodshards to the gnoll in the cage to get increased agility/spirit.

05) Run down and do, in the following order:

06) "Egg Hunt"

07) "Chen's Empty Keg"

08) "Betrayal from Within" and "Weapons of Choice"

09) "Gann's Reclamation" then turn it in, accept the next part.

10) Hearth back to Camp Taurajo, turn in quests ... accept "Betrayal from Within" part2

11) Fly to XR.

12) Turn in "Betrayal from Within" part2 and "Egg Hunt"

13) Do "Ishamuhale" (at 60.32)

14) Turn in "Further Instructions" ... accept "Further Instructions" part2

15) Turn in "Deepmoss Spider Eggs" and "Chen's Empty Keg"

16) Fly to XRs

17) Fly to Stonetalon Mountains...


See Full Video:      High Quality  |  Low Quality


23-25 Stonetalon Mountains

01) Accept all quests at Sun Rock Retreat...

02) And make it your home.

03) Turn in "Boulderslide Ravine" .. I SKIP "Earthen Arise" (Elite) (accept the others quests there though)

04) Do:

05) "Cycle of Rebirth"

06) "Cenarius' Legacy"

07) "Jin'Zil's Forest Magic"

08) Turn in "Cycle of Rebirth" ... accept "New Life"

09) Turn in "Cenarius' Legacy" ... accept  "Ordanus"

10) NOTE: I skip getting my level 24 spells/abilities (cause there's little that are useful at this level)

11) Go turn in "Further Instructions" part2 ... accept "Gerenzo Wrenchwhistle"

12) Go do "Gerenzo Wrenchwhistle" (See Video) and "Shredding Machines"

13) Then turn  in "Gerenzo Wrenchwhistle".

14) Then do "Arachnophobia" (Elite) (wanted poster) (See Video)

15) Turn in "Jin'Zil's Forest Magic"

16) Turn in "Shredding Machines"

17) Hearth back to Sun Rock Retreat

18) Turn in "Arachnophobia" (Elite)

19) Go do:

20) "New Life"

21) "Elemental War"

22) "Harpies Threaten"

23) Turn them all in.

24) Fly directly to CT...


See Full Video:      High Quality  |  Low Quality


25-25 Southern Barrens

01) Turn in "Ishamuhale" ... accept "Enraged Thunder Lizards"

02) Make CT your home.

03) Accept "A New Ore Sample"

04) Go down and do:

05) "Enraged Thunder Lizards"

06) You should find the mob Washte Pawne, he drops "Washte Pawne Feather" which starts "Washte Pawne"

07) "Revenge of Gann" Turn it in, accept the next part...

08) "Revenge of Gann" Part 3, then turn it in, head south...

09) Go to the Great Lift.

10) Turn in "Calling in the Reserves"

11) Accept "Message to Freewind Post"

12) Run to Freewind Post...


See Full Video:      High Quality  |  Low Quality


25-26 Thousand Needles

01) Turn in "Message to Freewind Post" accept "Pacify the Centaur"

02) Accept "Wanted - Arnak Grimtotem" "Alien Egg" "Wind Rider"

03) Get FP there.

04) Go do (in the following order):

05) "Pacify the Centaur"

06) "Test of Faith" (the cave at 52.43)

07) "A New Ore Sample"

08) "Alien Egg" (this egg has 3 possible spawn points, either at around: 52.56/45.63/41.60)

09) If your not level 26 (or two bars away from it), grind till you are.

10) Go to Freewind Post..

11) Turn in "Pacify the Centaur" ... accept "Grimtotem Spying"

12) Turn in "Alien Egg" ... accept "Serpent Wild"

13) Hearth to Camp Taurajo.

14) Turn in "Enraged Thunder Lizards" and "Washte Pawne" ... accept "Cry of the Thunderhawk"

15) Turn in "A New Ore Sample"

16) Go do "Cry of the Thunderhawk" then turn it in ... I SKIP "Mahren Skyseer"

17) Fly to Thunder Bluff to get new spells/abilities.

18) Turn in "Melor Sends Word" ... accept "steelsnap" (on hunter rise)

19) Accept "The sacred Flame"

20) Fly to Ashenvale...


See Full Video:      High Quality  |  Low Quality


26-27 Ashenvale

01) Make it your home.

02) Do the following order:

03) Accept all the quests, note: I SKIP "Warsong Supplies"

04) Kill the first of the three mobs related to the Ashenvale hunt:

05) "Sharptalon's Claw" (Kill Sharptalon, then he drops the item that starts this quest) (hint: easy way to kill it (he's lvl 31 mob), is kill him half way then drag him into the guards at Splintertree Post, they will finish em LOL).

06) Do: "Ashenvale Outrunners" (use track hidden, to find them better)

07) Then go slightly west and do "Torek's Assault" (starts at 68.75, also this is not shown in the video but it should be done)

08) "Stonetalon Standstill" *find and kill Tideress he starts: "The Befouled Element"

09) Kill Ursangous, "Ursangous's Paw" (Ashenvale hunt)

10) Kill Shadumbra "Shadumbra's Head" (Ashenvale hunt)

11) "The sacred Flame" (find a phial killing the dryads at 61.52, and fill it at the moonwell at 59.74)

12) Hearth to Splintertree Post to turn in all the quests.

13) Fly to Zoram Strand.

14) Turn in "Je'neu of the Earthen Ring" and "Trouble in the Deeps"

15) Do: "Between a Rock and a Thistlefur" and "Troll Charm"

16) Turn them in, hearth back to Splintertree Post.

17) If im not level 27 i'll grind till I am

18) Stable pet

19) Tame a Ghostpaw Alpha (lvl 27) to get *Bite rank 4*, then abandon him...

20) Tame an Elder Ashenvale Bear (lvl 25-26) to get *Claw rank 4*, then abandon him...

21) Get cat back out.

22) Accept "Destroy the Legion"

23) Go do "Ordanus" (61.52) (fight your way to him, just kill the guy, grab his head and jump out of there!)

24) Go do: "Satyr Horns" (80.52)

25) Then do: "Destroy the Legion"  (you should find an item called Diabolical Plans, which starts "Diabolical Plans" while doing this quest)

26) Run back to Splintertree Post (don't hearth).  Turn in ALL quests, I SKIP "Never Again!"

27) NOTE: i skip the "The Lost Pages" quest, only because I can't trade pages while I'm on a new server.

28) Fly to Stonetalon Mountains...


See Full Video:      High Quality  |  Low Quality

27-27 Stonetalon Mountains

01) Turn in "Ordanus" ... I SKIP "The Den"

02) Make it your home.

03) Accept "Bloodfury Bloodline" (Elite), go kill Bloodfury Ripper (30.63)(grinding mobs along the way) (See Video), then hearth back..

04) Turn it in.

05) Fly to Thunder Bluff

06) Turn in "The sacred Flame" ... accept "The sacred Flame" part2

07) Fly to Thousand Needles...


See Full Video:      High Quality  |  Low Quality


27-29 Thousand Needles

01) Turn in "The sacred Flame" ... accept "The sacred Flame" part3 and "A Different Approach"

02) I do the following order:

03) "The sacred Flame" (charge the brazier in the cave at 44.37) (See Video)

04) Go to Whitereach Post, grab quests there, go do:

05) "Sacred Fire"

06) "Wind Rider"

07) "Homeward Bound" (escort) (if the Elite gets in the way, skip it)

08) "Steelsnap" (See Video)

09) "A Different Approach"

10) Hearth to Sun Rock Retreat.

11) Fly to TB

12) Turn in "Steelsnap" - accept "Frostmaw"

13) Turn in "Sacred Fire" -accept "Arikara" (Elite)

14) Get new spells/abilities.

15) Fly back to 1K Needles.  Make Freewind Post your home.

16) Turn in "The sacred Flame" and "Wind Rider"

17) Do: "Grimtotem Spying"

18) "Arikara" (Elite) (See Video)

19) "Wanted - Arnak Grimtotem"

20) "Free at Last" (escort)

21) Go to Whitereach Post, turn in "Arikara" (Elite) and "A Different Approach" ...accept "A Dip in the Moonwell"

22) Go do: "A Dip in the Moonwell"  (the control console is at 9.18)

23) Grind to level 29 (which should only be a couple bars), I grind away at centuars around Camp E'Thok

24) Then do "Hypercapacitor Gizmo" (Elite) (kill mobs around the cage, free him, use immolation trap/fear to kill it)  (See Video)

25) Kill the "Galak Messenger", he drops "Assassination Note" which starts "Assassination Plot" Turn in for Easy XP.  Also turn in "A Dip in the Moonwell"  ... accept "Testing the Tonic"

26) Then do: "Protect Kanati Greycloud"

27) Hearth back to Freewind Post.

28) Turn in ALL quests

29) NOTE: I skip "Test of Endurance" quest, although I don't know if they nerfed it any or not since last time I tried it.

30) Fly to Orgrimmar

31) Make Orgrimmar your home.

32) Go to UC

33) Run to Tarren Mill (go out of the UC through the sewers, it's faster)�

See Full Video:      High Quality  |  Low Quality

29-30 Hillsbrad Foothills

01) Accept "Time To Strike" (at the Southpoint Tower, right when u enter Hillsbrad)

02) Once at Tarren Mill:

03) Turn in "Time To Strike"

04) Accept "Helcular's Revenge"

05) Accept "Elixir of Pain"

06) GET FLIGHT PATH THERE!!!!

07) Go start killing Yetis...

08) I keep grinding away at Yetis until I hit 30. (OPTIONAL: you could go do RFK instead of the grinding)

09) Also, the "Helcular's Rod" should have dropped before hitting 30, if not keep grinding away till it does.

10) As soon as I hit 30, I hearth to Orgrimmar to get new spells/abilities.

11) Then go back to Hillsbrad.

12) Turn "Helcular's Revenge" in, accept the next part to it.

13) Go back to the Yeti cave...

14) Charge The Flame of Azel and the Flame of Veraz,  for the quest "Helcular's Revenge"

15) I keep grinding away at Yetis until my pet levels up.

16) Go up into Alterac Mountains...

See Full Video:      High Quality  |  Low Quality


30-30 Alterac Mountains

01) Do the following:

02) "Elixir of Pain" (killing the level 32-34 mountain lions, on the plateaus there)

03) Charge the third flame (Flame of Uzel), for the quest "Helcular's Revenge"

04) Kill "Frostmaw" Yes I know your gonna be killing "Frostmaw" (level 37 mob) at level 30, it's a tough battle so prepare yourself! (See Video)  NOTE:  If you fail, you can try again later once you come back here at Level 37.

05) Run down to Southshore, to drive the rod into Helcular's grave. (hint: I use my pet to distract the guards, by having my pet run all over the place). This is for the quest "Helcular's Revenge" (See Video)

06) Run back to Tarren Mill

07) Turn in "Elixir of Pain"

08) Accept "The Hammer May Fall"

09) Run into Arathi Highlands...

See Full Video:      High Quality  |  Low Quality


30-30 Arathi Highlands

01) Go do this quest:

02) "The Hammer May Fall" (at 34.45)

03) Then run to Hammerfall.

04) Accept "Hammerfall"

05) Turn in "Hammerfall" ... accept "Rising Spirits"

06) Turn in "The Hammer May Fall"

07) Get FP there.

08) Then do "Rising Spirits" then turn it in ... accept "Rising Spirits" part2

09) Turn in "Rising Spirits" part2 ... accept "Rising Spirits" part3

10) Turn in "Rising Spirits" part3 ... skip "Guile of the Raptor" for now.

11) Hearth to Orgrimmar.

12) Get on the Zeppelin to go to Grom'Gol.


See Full Video:      High Quality  |  Low Quality


30-31 Stranglethorn Vale

01) Get the FP at Grom'Gol.

02) Go up north and start doing the STV hunt quests:

03) "Welcome to the Jungle"

04) "Tiger Mastery" (Young Stranglethorn Tigers)

05) "Panther Mastery" (Young Panthers)

06) "Panther Mastery" (Panthers)

07) "Tiger Mastery" (Stranglethorn Tigers)

08) "Raptor Mastery" (Stranglethorn Raptors)

09) Accept "Tiger Mastery" (Elder Stranglethorn Tigers) .. but don�t do it now.

10) Accept "Raptor Mastery" (Lashtail Raptors) .. but don�t do it now.

11) Skip the rest for now.

12) You should be lvl 31 now for sure, if not grind to it.

13) Hearth to Orgrimmar.

14) Fly to XRs.

15) Run west in the XRs ... accept "The Swarm Grows"

16) Then run west from the XRs to the guy in the hut ... accept "The Kolkar of Desolace"

17) Run back to XRs.

18) Fly to 1K needles.

19) Go to Shimmering Flats...


See Full Video:      High Quality  |  Low Quality


31-32 Thousand needles (Shimmering Flats)

01) Accept:

02) "Hemet Nesingwary"

03) "Wharfmaster Dizzywig"

04) Accept and do:

05) "A Bump in the Road"

06) "Hardened Shells"

07) "Load Lightening"

08) "Rocket Car Parts"

09) "Salt Flat Venom"

10) Turn them in

11) Accept:

12) "Goblin Sponsorship"

13) "Martek the Exiled"

14) I SKIP "Encrusted Tail Fins" (Elite)

15) You should be 32 now, if not grind to it.

16) Go to Tanaris to get FP

17) Hearth to Orgrimmar

18) Turn in "The Swarm Grows"

19) Accept "Alliance Relations" (get it from Craven Drok in the Cleft of Shadow)

20) Then go to Keldran in Orgrimmar to accept "Alliance Relations" part 2.

21) Stop at first aid guy to buy silk bandage training.

22) Then fly to Stonetalon Mountains.

23) Run into Desolace...


See Full Video:      High Quality  |  Low Quality

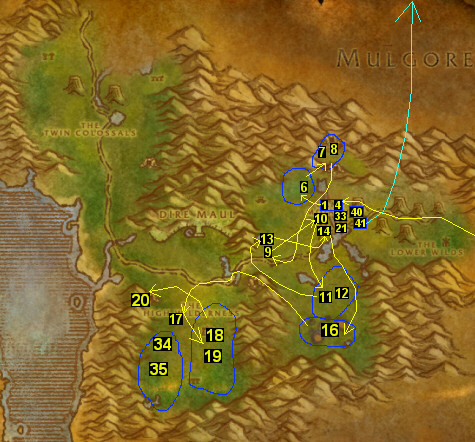
32-34 Desolace

01) First thing to do here is start killing mobs at the Thunder Axe Fortress...

02) Until this item drops "Flayed Demon Skin" which starts: "The Corrupter"

03) Then go down the path and do:

04) "Kodo Roundup" (dont have to finish all of it now)

05) Then go to Ghost Walker Post

06) Turn in "The Kolkar of Desolace" ... accept "Khan Dez'hepah"

07) Accept "Gelkis Alliance" (this is the one you should choose to do)

08) Turn in "Alliance Relations" ... accept "Alliance Relations" again ... accept "Befouled by Satyr"

09) Turn in "The Corrupter" ... accept "The Corrupter" part2

10) Turn in "Alliance Relations" ... accept "The Burning of Spirits"

11) Do in the following order:

12) "Befouled by Satyr"

13) "The Corrupter" Part2 (collect a Shadowstalker Scalp from a Hatefury shadowstalker)

14) "Khan Dez'hepah"

15) "Gelkis Alliance"

16) Turn them in, collect new quests then do:

17) Then run to Shadowprey Village (stopping along the way to turn this in: "Gelkis Alliance") - accept "Stealing Supplies"

18) Accept all quests at Shadowprey Village

19) Make Shadowprey Village your home.

20) Then do:

21) Go in the water and collect 10 "Shellfish" (from the Shellfish traps)

22) Turn those in for 2 "Bloodbelly Fish"

23) Then travel up the water (collecting "Soft-shelled Clam Meat" for the quest "Clam Bait" along the way)

24) Then accept "Claim Rackmore's Treasure!" (the chest/wrecked boat along the shore)

25) And accept "Sceptre of Light"  (the argent dawn dude)

26) Then go do:

27) "The Burning of Spirits"

28) "Sceptre of Light"

29) "Hand of Iruxos" (See Video)

30) Then grind your way back to the argent dawn dude...

31) Then turn "Sceptre of Light" in and get "Book of the Ancients" quest

32) Then go do all this stuff in the water to the west:

33) "Other Fish to Fry"

34) "Clam Bait"

35) "Book of the Ancients" (See Video)

36) "The Corrupter" Part3 (collect a Oracle Crystal  from a Slitherblade Oracle)

37) "Claim Rackmore's Treasure!" (the chest along the shore)

38) Then turn in "Claim Rackmore's Treasure!"

39) Turn in "Book of the Ancients"

40) Then go accept "Bone Collector"  (grinding mobs along the way)

41) Go to Ghost Walker Post, turn in all quests (including "Catch of the Day") .. accept new ones.

43) Then go do:

44) "Bone Collector"

45) Then "Centaur Bounty" and "Stealing Supplies"

46) Then go turn in "Bone Collector"

47) Then turn in "Centaur Bounty"

48) Hearth to Shadowprey Village

49) Stable pet

50) Turn in all quests there.

51) You should be level 34 now for sure.

52) Turn in "Stealing Supplies" - accept "Ongeku"

53) Go tame a Scorpashi Lasher (lvl 34) to get *Claw rank 5*

54) Fly CT.

55) Once at CT, run into Dust Wallowmarsh

56) Collect the 3 quest-objects at the Shady Rest Inn: (See Video)

57) "Suspicious Hoofprints" (just right outside in front of the inn)

58) "Lieutenant Paval Reethe" (laying on one of the planks on the ground)

59) "The Black Shield" (on top of the fireplace)

60) Now run to Brackenwall Village

61) Turn those 3 quests in ("Suspicious Hoofprints" "Lieutenant Paval Reethe" "The Black Shield")

62) Stop at the troll vendor, buy the 3 first aid books

63) Fly to XRs

64) Fly to Ratchet to turn in "Goblin Sponsorship" & "Wharfmaster Dizzywig" ... accept new quests.

65) Get on the boat to go to BB (Booty Bay) ... (while waiting for the boat, build up first aid)


See Full Video:      High Quality  |  Low Quality

34-35 Stranglethorn Vale

01) Grab all quests to do in BB

02) Cat should still be stabled, you should still have the Scorpashi Lasher as a pet.

03) Make BB your home.

04) Fly to Grom'gol...

05) Grab all quests in grom'gol

06) Get new hunter spells/abilities

07) Go tame a Stranglethorn Tiger to get *Dash rank 1*

08) Then, this is the main pet I use for the rest of the game.

09) Go complete these quests:

10) "Singing Blue Shards"

11) "Tiger Mastery" (Elder Stranglethorn Tigers)

12) "Bloodscalp Ears" along with "Bloodscalp Insight" and...

13) "Hunt for Yenniku"

14) "Bloody Bone Necklaces"

15) "Raptor Mastery" (Lashtail Raptors)

16) "The Defense of Grom'gol"

17) Once all those are done, go to Grom'gol

18) Turn in "Hunt for Yenniku" ... accept "Headhunting"

19) Turn in "The Defense of Grom'gol" ... accept "The Defense of Grom'gol" part2.  Also turn in "Bloodscalp Insight" ... accept "An Unusual Patron"

20) Should be lvl 35 now for sure, buy new water/food/repair, then go do (in the following order):

21) "Headhunting"

22) "An Unusual Patron"  (the altar is at 19.22)

23) "The Vile Reef" (Elite) (See Video)

24) Then go to Nesingwary's Expedition ... turn in all quests, accept all new ones.  Then go do:

25) "Tiger Mastery" (Sin'Dall)  (he is usually on top of the hill at 31.18).  Once that is done, go turn it in, then go do:

26) "Hostile Takeover" along with "Goblin Sponsorship"

27) "Panther Mastery" along with "Mok'thardin's Enchantment" (kill shadowmaw panthers)

28) "The Defense of Grom'gol" part2, once that's done.

29) Hearth to BB, turn in quests.

30) Turn in "Goblin Sponsorship" ... accept "Goblin Sponsorship" part3

31) Fly to Grom'gol, should be level 36 now, turn in quests.  accept "Trollbane"

32) Get new hunter spells/abilities

33) Get on the zeppelin to go to the Undercity.

34) Once in the UC, accept "To Steal From Thieves"

35) Then fly to Hammerfall...

See Full Video:      High Quality  |  Low Quality


35-37 Arathi Highlands

01) Make Hammerfall your home.

02) Turn in "Trollbane" ... I SKIP "Sigil of Strom" (Elite)

03) Accept "Call to Arms" "Foul Magics" "Guile of the Raptor"

04) Grind your way down south and do: "Call to Arms"

05) Then grind your way up north and accept "The Princess Trapped" (just west of hammerfall 59.35)

06) Then go do "The Princess Trapped" (mobs are east of hammerfall)

07) Go in the cave (look for the tree, shows you where the hidden path is)...

08) Then turn in "The Princess Trapped" ... accept "Stones of Binding"

09) Go to hammerfall, turn in "Call to Arms" ... accept "Call to Arms"

10) Build up first aid, go do "Triage" (See Video) (Doctor Gregory Victor, first aid training)

11) Then do:

12) "Stones of Binding" (first key, just west of hammerfall 62.35)

13) Then do: "To Steal From Thieves" (at 54.40)

14) Go down south a little and get the next key for "Stones of Binding" (52.50)

15) Then go down and do:

16) "Call to Arms" (killing ogres) and "Guile of the Raptor" (killing Highland Fleshstalkers)

17) Then go up and do "Foul Magics" (at 31.28)

18) Then go west and get the last key for "Stones of Binding" (25.31)

19) Go discover Stromguard, and turn in "Stones of Binding" (at the Circle of Inner Binding)(35.59)

20) Note: i SKIP "Breaking the Keystone" (Elite)

21) Hearth to Hammerfall

22) Turn in "Call to Arms" "Foul Magics" "Guile of the Raptor"

23) Complete the "Guile of the Raptor" quest chain by running back and forth...

24) NOTE: i SKIP all stromguard quests (but I still recommend doing them if you can find groups)

25) Fly to Tarren Mill...

See Full Video:      High Quality  |  Low Quality

37-37 Alterac Mountains

01) Once at TM, accept "Prison Break In" and "Stone Tokens"

02) Then go do them in Alteric Mountains (at Dalaran)

03) Then turn them in and accept "Dalaran Patrols" and "Bracers of Binding"

04) Then go do them in Alteric Mountains (at Dalaran)

05) Once they are both completed, die on purpose, so u end up at TM

06) Turn them in, then fly to the UC.

07) Once at UC, turn in "To Steal From Thieves"

08) Make sure you buy some fungus food (food for a turtle you�re about to tame later)

09) Then go to the cooking center in UC and buy 3 soothing spices. (this is for a later quest)

10) Get on zeppelin to go to orgrimmar

11) Once in Orgrimmar, turn in "Alliance Relations" at Keldran. (at 21.53)

12) Then fly to XRs.

13) Make XRs your home.

14) Fly to Freewind Post (1k needles)...

See Full Video:      High Quality  |  Low Quality

37-37 Thousand Needles

01) Stable pet

02) Run towards the Shimmering Flats..

03) Turn in "The Swarm Grows" ... accept "The Swarm Grows" part2

04) Go tame a level 34-35 turtle (for Bite Rank5), feed the fungus/fruit/fish to him.

05) Stop at the goblins and turn in "Delivery to the Gnomes" "Parts for Kravel" and "Goblin Sponsorship" part3

06) Accept "The Rumormonger"

07) Use that turtle to Do the following quests:

08) "The Swarm Grows" and "Parts of the Swarm" (quest starts from an item drop)

09) Then go turn in "The Swarm Grows"

10) Hearth to XRs

11) Abandon turtle, get cat back out.

12) Turn in "Parts of the Swarm" ... accept "Parts of the Swarm" part2

13) Fly to Dustwallow Marsh...


See Full Video:      High Quality  |  Low Quality


37-38 Dustwallow Marsh

01) Accept "Theramore Spies" "The Black Shield" and "Twilight of the Dawn Runner"

02) Go slightly south of Brackenwall Village and accept "Hungry!" (the orge at 35.37)

03) I turn this zone into a quest-grind area, ill move around killing anything in my path while focusing on these quests:

04) "Theramore Spies" "The Black Shield" "Hungry!"  (I do "Hungry!" at 58.23)

05) I go to the Northpoint Tower at 46.23 and do "Twilight of the Dawn Runner" (the Cargo is at the very top of the tower)

06) I stop at Jarl's cabin (55.25) and get "The Lost Report" quest (the dirt mound next to his cabin)

07) And turn in "Soothing Spices" ... accept "Jarl Needs Eyes"

08) I'll stop at the big raptor spot at 47.17, and grind it clear several times.

09) I do the escort quest: "Stinky's Escape" (starts at 45.17) (grind mobs during this quest)

10) Then go do "Jarl Needs Eyes" (while focusing on the others too)

11) Stop at Brackenwall Village and turn in all quests, accept new ones.

12) Turn in "Hungry!"

13) Stop back at Jarl's cabin, go to the dirt mound once again to get "The Severed Head"

14) Turn in "Jarl Needs Eyes" ... I SKIP "Jarl Needs a Blade"

15) I grind some more at the raptors and such, at this point I should be a little over half way to 39.

16) I then go do this quest:

17) "The Theramore Docks" the Captain's Documents are under the water at 71.51  (See Video)

18) I then die on purpose, so I end up right at Brackenwall Village.

19) Turn in "The Theramore Docks"

20) Turn in "The Severed Head" ... accept "The Troll Witchdoctor"

21) Hearth to XRs

22) Fly to Ratchet, turn in "Stinky's Escape" while your there.

23) Get on the boat to go to BB...


See Full Video:      High Quality  |  Low Quality


38-40 Stranglethorn Vale

01) Accept "The Bloodsail Buccaneers" "Scaring Shaky" "Venture Company Mining"

02) Make BB your home.

03) Fly to Grom'gol

04) Accept "Mok'thardin's Enchantment"

05) Turn in "The Troll Witchdoctor" ... right click the cauldron ... accept "Marg Speaks"

06) Go do:

07) "Raptor Mastery" (Jungle Stalkers) along with "Mok'thardin's Enchantment"

08) Grind away at raptors/cold eye ballisks till level 39, then do:

09) "Venture Company Mining" (at 40.42)

10) Then go turn in "Mok'thardin's Enchantment" ... accept "Mok'thardin's Enchantment" part3

11) Then do "Panther Mastery" (Elite) (Bhag'thera) (he has 2 different spawn points, either at 48.20 or 47.26)  (See Video)

12) Then turn in "Panther Mastery" (Elite) (Bhag'thera) and "Raptor Mastery" (Jungle Stalkers)

13) Accept "Raptor Mastery" (Elite) (Tethis) but don�t do it now.

14) Hearth to BB

15) Turn in "Venture Company Mining"

16) Then go do

17) "The Bloodsail Buccaneers" (just slightly north-west of BB, there's a little note on a barrel, click on it, accept new quest). (See Video)

18) "Scaring Shaky" along with "Mok'thardin's Enchantment" part3

19) Once that's done run back into BB

20) Turn in "Scaring Shaky" ... accept "Return to MacKinley"

21) Turn in "The Bloodsail Buccaneers" ... accept "The Bloodsail Buccaneers"

22) Turn in "Return to MacKinley"

23) Turn in "The Bloodsail Buccaneers" at Fleet Master Seahorn

24) Fly to Grom'gol

25) Turn in "Mok'thardin's Enchantment" part3

26) You should be a little over half way to 40 now.

27) Now I grind the rest of the way to 40 on raptors/cold eye ballisks

28) OPTIONAL: Scarlet Monastery instance instead of the grinding.

29) Once I hit 40, I get new hunter spells/abilities at grom'gol

30) Then get on the zeppelin to go to the UC.

31) Fly to Hammerfall

32) Run all the way to the Badlands...


See Full Video:      High Quality  |  Low Quality

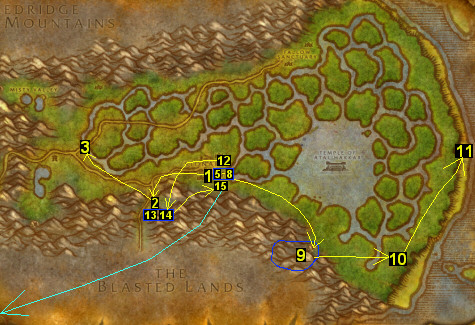
How to run to the Badlands from Arathi Highlands:

40-41 Badlands

01) The goal here is not to leave till your level 41, so grind mobs every where you go to...

02) Turn in "Martek the Exiled" (at 44.53) ... I SKIP "Indurium" Or any quest involving Uldaman.

03) Accept "Barbecued Buzzard Wings"

04) Grind your way north-west...

05) Accept "Study of the Elements: Rock"

06) Grind your way west to Kargath...

07) Get FP at Kargath

08) Do NOT make Kargath your home. (it should still be BB)

09) Accept: "Unclaimed Baggage" "Coyote Thieves" "Report to Helgrum" "Broken Alliances" and "Badlands Reagent Run"

10) Then go do:

11) "Barbecued Buzzard Wings"

12) "Coyote Thieves"

13) "Broken Alliances" (See Video)  (i skip the next part to this quest)

14) "Badlands Reagent Run"

15) "Unclaimed Baggage"  (this is done at Angor Fortress, 42.31)  (the Pack is in an orange barrel on the left entrance of the fortress, and the Rapier is on the weapon rack going through the right entrance of the fortress)

16) "Study of the Elements: Rock" (lesser rock elementals), turn in, then do...

17) "Study of the Elements: Rock" (rock elementals), turn in, then do...

18) "Study of the Elements: Rock" (greater rock elementals).

19) Then make sure all quests are done and turned in, then grind your way east discovering new areas, eventually end up at Lethlor Ravine grinding away at dragon whelps for a little bit.

20) You should be 41 now for sure, if not grind to it.

21) Hearth to BB

22) Fly to Grom'gol

23) Then run all the way to Swamp of Sorrows.

24) Stopping along the way to accept this quest: "Nothing But the Truth" (in Duskwood at 87.35)

25) Then turn in "Nothing But the Truth" (the guy right next to him)

26) Accept "Nothing But the Truth" again.

27) Then run into Swamp of Sorrows...


See Full Video:      High Quality  |  Low Quality


41-42 Swamp of Sorrows

01) Start off doing:

02) "Dream Dust in the Swamp" It may take several trips to that area to complete it.

03) "Nothing But the Truth"  kill the Mire Lord for the Mire Lord Fungus (at 6.32)

04) Find and kill Cudgel, he drops Noboru's Cudgel, which starts "Noboru the Cudgel"

05) Go turn in "Noboru the Cudgel" ... accept "Draenethyst Crystals"

06) Grind to Stonard

07) Make it your home

08) Accept: "Lack of Surplus" "Fresh Meat" and "Little Morsels"

09) Stable pet.

10) Get FP.

11) Turn in "Report to Helgrum" ... accept "Pool of Tears" (Elite)

12) Go tame a DeathStrike Tarantula (for Bite Rank6), then abandon.

13) Go tame a Silt Crawler (for Claw Rank6), then abandon.

14) Then hearth to Stonard.

15) Get cat back out.

16) Go do the following quests:

17) "Pool of Tears" (Elite) (the artifacts are in the water around temple of atal'hakkar)

18) "Lack of Surplus" then turn it in ... accept "Lack of Surplus" part2 ... then go do it.

19) "Fresh Meat"

20) "Nothing But the Truth" (shadow panther hearts)

21) "Ongeku" along with "Draenethyst Crystals" and "Little Morsels"

22) Go turn in "Draenethyst Crystals"

23) Turn in "Lack of Surplus" part2 ... accept "Threat From the Sea"

24) Turn in "Threat From the Sea" then accept "Threat From the Sea" again

25) Go do "Threat From the Sea" along with "Fresh Meat"

26) Turn in "Threat From the Sea" ... accept "Continued Threat"

27) Do NOT do "Continued Threat" You will do this at a later level.  Make sure the quest stays accepted though.

28) Hearth to Stonard

29) Turn in "Fresh Meat" "Little Morsels" and "Pool of Tears" (Elite) ... accept "The Atal'ai Exile"

30) Should be lvl 42 now, get new hunter spells/abilities.

31) Fly to Grom'gol...

See Full Video:      High Quality  |  Low Quality

42-43 Stranglethorn Vale

01) Accept "Mok'thardin's Enchantment" part4 "Split Bone Necklace"

02) Fly to BB

03) Accept ALL quests in BB

04) Turn in "Dream Dust in the Swamp"

05) Make BB your home.

06) Then go do in the following order:

07) "The Bloodsail Buccaneers" along with "Up to Snuff" and "Keep An Eye Out"

08) "Mok'thardin's Enchantment" part4 along with "Akiris by the Bundle"

09) "Zanzil's Secret" along with "Voodoo Dues"

10) "Skullsplitter Tusks" along with "Split Bone Necklace"

11) I keep grinding away at Skullsplitter trolls until I'm at least 2-3 bars away from 43.

12) Then hearth to BB

13) Turn in ALL quests.

14) Fly to grom'gol

15) Turn in "Mok'thardin's Enchantment" part4 and "Split Bone Necklace"

16) Accept "Grim Message"

17) Get on the zeppelin to go to Orgrimmar.

18) Fly to Thunder Bluff

19) Turn in "Frostmaw" ... accept "Deadmire" (hint: I usually keep Frostmaw's mane in my bank for a long time)

20) Fly to Desolace (or Dustwallow Marsh)...


See Full Video:      High Quality  |  Low Quality


43-43 Desolace

01) OPTIONAL: This whole section can be skipped if you are 4-5 blocks or more into lvl 43, it would not hurt to skip this section and go straight to Dustwallow Marsh.

02) Make Shadowprey Village your home.

03) Accept "Portals of the Legion"

04) Go turn in "Ongeku" ... SKIP "Khan Jehn"

05) While your in Desolace, keep an eye out for an Elite Giant for the quest "Nothing But the Truth"...

06) ...If you don�t find the giant and get the "Deepstrider Tumor", then the quest will have to be abandoned, I don�t spend time going all over looking for a deepstrider gaint.

07) Then do:

08) "Portals of the Legion"

09) "The Corrupter" (Elite) (Slay Lord Azrethoc and Jugkar Grim'rod)

10) Turn in "The Corrupter" (Elite)

11) Then hearth to Shadowprey Village

12) Turn in "Portals of the Legion"

13) Fly to Dustwallow Marsh...


See Full Video:      High Quality  |  Low Quality

43-43 Dustwallow Marsh

01) Accept "Identifying the Brood" "Army of the Black Dragon" and "Overlord Mok'Morokk's Concern"

02) Go down to (39.36) and accept "Questioning Reethe" then do it.

03) Go down and do:

04) "Deadmire"

05) "Marg Speaks" kill the mobs at around (58.63)

06) "Identifying the Brood" along with "Army of the Black Dragon"

07) "Overlord Mok'Morokk's Concern"  (Snuff=44.66, Grog=38.65, Strongbox=in the cave at 36.69 [the entrance to the cave is at 38.66])

08) Then grind your way back to Brackenwall village

09) Turn in "Questioning Reethe" "Army of the Black Dragon" "Overlord Mok'Morokk's Concern" and "Identifying the Brood" ... accept "The Brood of Onyxia"

10) Run back and forth until "The Brood of Onyxia" is done, but don't actually do the final quest yet (this will be done later at level 48, so you can abandon it for now).

11) Turn in "Marg Speaks" ... accept "Report to Zor"

12) Fly to Tanaris...


See Full Video:      High Quality  |  Low Quality


43-44 Tanaris

01) Go into Gadgetzan...

02) Accept: "WANTED: Andre Firebeard" "WANTED: Caliph Scorpidsting"

03) Turn in "Tran'Rek"

04) Accept: "Gadgetzan Water Survey" "Wastewander Justice" "Water Pouch Bounty"

05) Make Gadgetzan your home.

06) Then grind your way east to Steamwheedle Port.

07) Then accept: "Pirate Hats Ahoy!" "Screecher Spirits" "Southsea Shakedown"

08) Turn in "Stoley's Debt" ... accept "Stoley's Shipment"

09) Then go complete these quests:

10) "Wastewander Justice"

11) "Water Pouch Bounty"

12) "Southsea Shakedown"

13) "Pirate Hats Ahoy!"

14) "Stoley's Shipment"

15) "Ship Schedules" (find this in one of the Pirate's footlocker at Lost Rigger Cove)

16) "WANTED: Andre Firebeard" (See Video)

17) Once their all done, hearth to Gadgetzan.

18) Turn in "Water Pouch Bounty" "Wastewander Justice" ... accept "More Wastewander Justice"

19) Go do "Gadgetzan Water Survey" (grinding mobs along the way, coords are at 38.29), then turn it in.

20) Go to Steamwheedle Port.

21) Turn in ALL quests there ... accept "Return to MacKinley"

22) Then go do: "More Wastewander Justice" along with "WANTED: Caliph Scorpidsting"

23) Then hearth to Gadgetzan.  Make sure you save (put in your bank) all the Wastewander Water Pouches you have, because you will need them for a later quest.

24) Turn in "More Wastewander Justice" and "WANTED: Caliph Scorpidsting"

25) Fly to Freewind Post

26) Run into Feralas...


See Full Video:      High Quality  |  Low Quality


44-46 Feralas

01) Run into Camp Mojache.

02) Accept ALL quests there.

03) Get FP.

04) Make it your home.

05) Then go do in the following order:

06) "War on the Woodpaw" go just north of Camp Mojache to do this.

07) "The Ogres of Feralas" along with "Gordunni Cobalt"

08) Make sure you click on one of the scrolls laying on the ground which starts: "The Gordunni Scroll"

09) Then go do: "A New Cloak's Sheen"

10) Turn ALL those quests in, accept new ones.

11) Go do "Alpha Strike" then turn it in.

12) Go do "Woodpaw Investigation" complete it ... accept "The Battle Plans"

13) Then go do "A Grim Discovery"

14) Turn those quests in, accept new ones.

15) Then go do:

16) "Stinglasher" along with "Zukk'ash Infestation"

17) "Screecher Spirits"

18) "The Ogres of Feralas" part2

19) "Dark Ceremony"

20) "The Mark of Quality"

21) Then go turn those quests in, accept new ones.

22) At this point in the game, I always tend to get 90+ gold to buy my mount.

23) I then Fly to Orgrimmar...

24) Once there I turn in: "Zukk'ash Report"

25) Accept "Ripple Recovery" (from Dran Droffers)

26) Then turn in "Ripple Recovery" (the guy right next to Dran) ... accept "Ripple Recovery" again.

27) Turn in "Parts of the Swarm" and "A Grim Discovery" at Belgrom Rockmaul ... accept "Betrayed"

28) Go turn in "A Strange Request" ... accept "Retrun to Witch Doctor Uzer'i" (cleft of shadow)

29) Go turn in "Report to Zor" ... accept/complete "Service to the Horde" (valley of wisdom)

30) Go turn in "The Gordunni Orb" (valley of spirits)

31) I then head south from Durotar and buy my mount!

32) Then hearth back to Feralas...

33) Turn in "Retrun to Witch Doctor Uzer'i" ... accept "Natural Materials" and "Testing the Vessel"

34) Then do "Natural Materials"

35) Grind away at hippogryphs till it's completed.

36) If the "OOX-22/FE Distress Beacon" item drops, accept the quest "Find OOX-22/FE!"

37) Turn in "Find OOX-22/FE!" (at 51.57)

38) If your not level 46, grind till you are on hippogryphs..

39) Hearth back to Camp Mojache.

40) Turn "Natural Materials" in ... accept "The Sunken Temple"

41) Fly to Thunder Bluff

42) Turn in "Deadmire"

43) Get new spells/abilities.

44) Fly to Splintertree Post (Ashenvale)

45) Then go into Azshara...


See Full Video:      High Quality  |  Low Quality


46-46 Azshara

01) Go accept "Spiritual Unrest" and "A Land Filled with Hatred" (at 10.78)

02) Then go do them, and turn them in.

03) Then go to Valormok (at 21.52)

04) Turn in "Betrayed"

05) Then get FP there and fly to Orgrimmar.

06) Then head to Under City.

07) Once at UC, accept: "Lines of Communication" (magic quarter)

08) Then go to (apothecarium quarter) and accept: "Seeping Corruption" and "Errand for Apothecary Zinge"

09) Then go turn in "Errand for Apothecary Zinge" (out in the other room)

10) Go return back, and turn in "Errand for Apothecary Zinge" again ... accept "Into the Field"

11) Fly to Tarren Mill.

12) Make Tarren Mill your home.

13) Then go into Hinterlands...


See Full Video:      High Quality  |  Low Quality


46-47 Hinterlands

01) Go turn in "Ripple Recovery" (at 25.47) ... accept "A Sticky Situation"

02) Ride all the way to Revantusk Village (at 77.80)

03) Accept: "Vilebranch Hooligans" "Cannibalistic Cousins" "Message to the Wildhammer" "Stalking the Stalkers" "Hunt the Savages" and "Avenging the Fallen". Before you go out and start questing make sure you stock up heavily on food/water/supplies cause you won't be back to town for while.

04) Then go do the following:

05) "Whiskey Slim's Lost Grog"

06) "Vilebranch Hooligans"

07) "Cannibalistic Cousins"

08) "A Sticky Situation" turn in later ... accept "Ripple Delivery"

09) "Stalking the Stalkers"

10) "Hunt the Savages"

11) "Testing the Vessel"

12) "Avenging the Fallen"

13) "Lines of Communication"

14) "Message to the Wildhammer"

15) "Rin'ji is Trapped!" (the escort quest, starts at 31.48)

16) "Grim Message" ...while doing this quest accept "Venom Bottles" (one of those little bottles on the table)

17) Yeah the good 'ol hinterlands grind.. have fun LOL.

18) If the "OOX-09/HL Distress Beacon" item drops, accept the quest "Find OOX-09/HL!"

19) Turn in "Find OOX-09/HL!" (at 49.38)

20) Turn in "Rin'ji is Trapped!" (at 86.59) ... accept "Rin'ji's Secret"

21) Go to Revantusk Village.

22) Turn in ALL quests.

23) Then get FP and fly to TM.

24) Turn in "Venom Bottles" ... accept "Undamaged Venom Sac"

25) I then get all my magewaeve out from my mailbox, then fly to Hammerfall...

26) Then go to Doctor Gregory Victor to build up first aid...

27) ...I�m usually able to get to 290 first aid for Heavy Runecloth bandage.  However, try to save 60 mageweave cloth for a later quest called "A Donation of Mageweave"

28) Then fly back to TM.

29) Then ride back into Hinterlands (don�t fly)

30) Go do "Undamaged Venom Sac" and "The Atal'ai Exile" (See Video on where to find this dude at) ... accept "Return to Fel'Zerul"

31) Then hearth to TM.

32) Turn in "Undamaged Venom Sac" ... I SKIP "Consult Master Gadrin" Only accept this quest if you still need to get a mount as orc/troll, as you turn it in in the same spot.

33) Fly to the UC.

34) Go to magic quarter and turn in "A Donation of Mageweave" (you need 60 mageweave cloth for this quest) 

35) Then turn in:  "Lines of Communication" and "Rin'ji's Secret" ..then complete "Oran's Gratitude"

36) Get on the zeppelin to go to Grom'gol...

See Full Video:      High Quality  |  Low Quality

47-47 Stranglethorn Vale

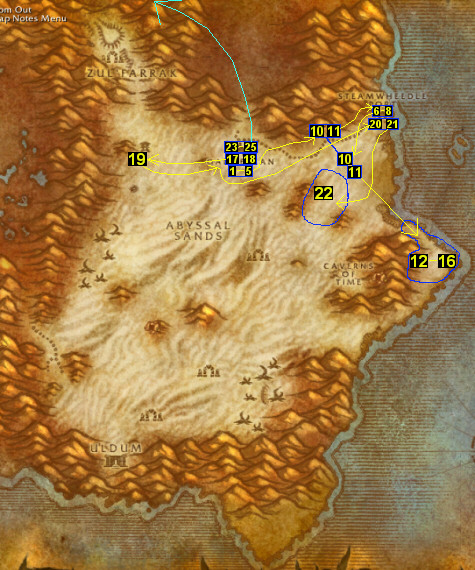
01) Go do "Raptor Mastery" (Elite) (Tethis) .. then turn it in.

02) Accept "Big Game Hunter" (Elite), go do it, then turn it in.

03) Go to Grom'gol..

04) Turn in "Grim Message"

05) Fly to BB.

06) Accept "The Bloodsail Buccaneers" part5

07) Turn in "Whiskey Slim's Lost Grog"

08) Make BB your home.

09) Accept "The Captain's Chest" (Elite) then go do it (at 36.65)  NOTE:  This quest is tough to solo, it can be soloed, but you should find a group to help you kill Gorlash, I personally skip it while racing to 60.

10) Go out to the shore east of BB, find a small bottle laying around the shore, until this item shows up:

11) "Carefully Folded Note" which starts "Message in a Bottle"

12) Go turn "Message in a Bottle" in (at 37.82)

13) Then go do "The Bloodsail Buccaneers" part5 (kill the three pirates in the three ships) ...while doing it, find "Cortello's Riddle" (it's usually a little scroll downstairs in the middle ship)

14) Then hearth back to BB, if hearth stone still is on a cooldown, die on purpose.

15) Turn in "The Bloodsail Buccaneers" part5 and "The Captain's Chest"

16) Fly to Kargath (Badlands)..

17) I get a stack of Silk Cloth out of the mailbox for the quest "Caught!", then...

18) Go into Searing Gorge...


See Full Video:      High Quality  |  Low Quality


47-48 Searing Gorge

01) First thing I do here is go south-east and do "Caught!" (guy in the outhouse), then turn it in. ... accept "Ledger from Tanaris" ... click on outhouse to get the "Goodsteel Ledger"

02) I then go start killing Glassweb Spiders for the "Ledger from Tanaris" quest.

03) Then go up north-west, Talk to Kalaran Windblade (at 39.39) on way to Thorium Point. Do first his listen to me quest "Divine Retribution". In order to get "The Flawless Flame" Once at Thorium Point collect ALL quests there and get the FP there too.

04) Then do the following:

05) "Fiery Menace!"

06) "Curse These Fat Fingers"

07) "STOLEN: Smithing Tuyere and Lookout's Spyglass"

08) "The Flawless Flame" turn in, then get and do "Forging the Shaft"

09) "JOB OPPORTUNITY: Culling the Competition"

10) "WANTED: Overseer Maltorius"  (Elite) (only do this quest with a group, even a level 60 has a hard time soloing this quest.

11) "What the Flux?"  This can be soloed with using your pet to distract them (as a hunter or warlock).  (See Video)

12) "Incendosaurs? Whateverosaur is More Like It"

13) "The Key to Freedom" starts from an item drop "Grimsite Outhouse Key", turn in at the outhouse (south-east)

14) Once all that's done, turn them all in. make sure you have all 20 solid crystal leg shafts.

15) Head south into Burning Steppes..

16) I discover some areas, then get FP there (at 65.25), and fly directly to Stonard (swamp of sorrows)...


See Full Video:      High Quality  |  Low Quality


48-48 Swamp of Sorrows

01) Make Stonard your home.

02) Go to the "Fallen Hero of the Horde" (36.64) ... keep talking to him till you get this quest: "The Disgraced One"

03) Then go do "Cortello's Riddle" (22.49 under the bridge) ... accept the next part to it.

04) If "Nothing But the Truth" is completed, go turn it in.

05) Either way, hearth back to Stonard.

06) Go turn in "Return to Fel'Zerul" and "The Disgraced One" ... accept "The Missing Orders"

07) Get new hunter spells/abilities

08) Go turn in "The Missing Orders" (in the inn) ... accept "The Swamp Talker"

09) Go do "The Swamp Talker" along with "Continued Threat" (in the cave at 65.78)

10) Then go turn in "Continued Threat"

11) Then go kill the mob Jarquia (at around 94.48), he drops Goodsteel's Balanced Flameberge ... for the quest "Ledger from Tanaris"

12) Then die on purpose, so you end up at Stonard.

13) Go to the "Fallen Hero of the Horde" (36.64) and turn in "The Swamp Talker"

14) Accept and do "A Tale of Sorrow" (Just talk to the guy)

15) Go back to Stonard and fly to Grom'gol

16) Get on the zeppelin to go to Orgrimmar.

17) Fly to Brackenwall Village (Dustwallow Marsh).  Once there accept "The Brood of Onyxia"

18) Then head south and get the Overdue Package for the quest "Ledger from Tanaris" (at 52.53)

19) Go down a bit and do "The Brood of Onyxia"  (the eggs can be found at 53.72 and 48.75)

20) Then head west to Bloodfen Burrow cave (31.67), and do "Cortello's Riddle" ... accept the next part to it.  (See Video doing this quest then dying on purpose to raptors)

21) Then die on purpose, so you end up back at Brackenwall Village.

22) Turn in "The Brood of Onyxia"

23) Then fly to Tanaris..

24) Turn in "Ledger from Tanaris" and "Into the Field" ... accept and complete "Slake That Thirst"

25) Then Fly to Feralas...


See Full Video:      High Quality  |  Low Quality


48-49 Feralas

01) Turn in "Testing the Vessel" ... accept "Hippogryph Muisek"

02) Accept: "Improved Quality" "Vengeance on the Northspring" "Dark Heart" (Elite)

03) Make it your home.

04) Go do "Hippogryph Muisek"

05) Then hearth back to Camp Mojache.

06) Turn in "Hippogryph Muisek" ... accept "Faerie Dragon Muisek"

07) Go do "Faerie Dragon Muisek" .. then turn it in ... accept "Treant Muisek"

08) Go do "Treant Muisek" .. then turn it in ... accept "Mountain Giant Muisek" (Elite)

09) Stable pet.

10) Go accept "Zapped Giants" (at 44.44)

11) Go tame an Ironfur Patriarch (for Claw Rank7)

12) Then use that pet to Do the following quests:

13) "Improved Quality"

14) "Perfect Yeti Hide" (you should find this item/quest while doing this quest: "Improved Quality")

15) "Vengeance on the Northspring"

16) "Dark Heart" (Elite)  (See Video)

17) "Mountain Giant Muisek" (Elite) along with "Zapped Giants"

18) Once those quests are completed and "Zapped Giants" is turned in...

19) ..Hearth to Camp Mojache.

20) Abandon bear, get cat back out.

21) Turn in "Mountain Giant Muisek" (Elite) ... accept "Weapons of Spirit" ... then turn it in complete it.

22) Turn in "Improved Quality" "Perfect Yeti Hide" "Vengeance on the Northspring" and "Dark Heart" ...

23) ... Accept "The Strength of Corruption"

24) Fly to Tanaris...

See Full Video:      High Quality  |  Low Quality

49-50 Tanaris

01) Make Gadgetzan your home.

02) Accept: "The Thirsty Goblin" "Noxious Lair Investigation" "Super Sticky" "Thistleshrub Valley" "The Dunemaul Compound"

03) Go turn in "The Sunken Temple" (at 52.46) ... accept "The Stone Circle" and "Gahz'ridian"

04) Go do (in the following order:

05) "The Dunemaul Compound" along with "Gahz'ridian"

06) "Noxious Lair Investigation"

07) "Thistleshrub Valley" along with "The Thirsty Goblin"

08) "Tooga's Quest" (escort turtle quest)

09) Then turn in "Tooga's Quest" along with "Screecher Spirits"

10) Hearth to Gadgetzan.

11) Turn in  "The Thirsty Goblin" ... accept "In Good Taste" turn it in ... accept "Sprinkle's Secret Ingredient"

12) Turn in "Thistleshrub Valley"  "The Dunemaul Compound" "Noxious Lair Investigation"

13) Accept "The Scrimshank Redemption"

14) Go do:

15) "Tanaris Field Sampling" ... turn in "Gahz'ridian" while your at it.

16) If the "OOX-17/TN Distress Beacon" item drops, accept the quest "Find OOX-17/TN!"

17) Turn in "Find OOX-17/TN!" (at 59.65)

18) NOTE: I skip all escort robot chicken quests, their not too hard, if you wanna try.

19) Once "Tanaris Field Sampling" is done, go do "The Scrimshank Redemption"  The secret for finding the item for this quest is keep making right turns in the cave and it will lead you to it.  (See Video)

20) Once "The Scrimshank Redemption" is done, die on purpose, so u end up at Gadgetzan.

21) Then turn in "Tanaris Field Sampling" ... accept "Return to Apothecary Zinge"

22) Turn in "The Scrimshank Redemption" ... accept "Insect Part Analysis"

23) Turn in "Insect Part Analysis" ... accept "Insect Part Analysis" again.

24) Turn in "Insect Part Analysis" ... accept "Rise of the Silithid"

25) Fly to Orgrimmar..

26) Make Orgrimmar your home.

27) Fly to Azshara...

See Full Video:      High Quality  |  Low Quality


50-50 Azshara

01) Accept: "Stealing Knowledge"

02) Go do:

03) "Stealing Knowledge"

04) "Seeping Corruption"

05) Once their done, turn in "Stealing Knowledge" ..accept ALL 4 delivery quests.

06) Turn in "Delivery to Archmage Xylem" (See Video on how to get to him) ... accept "Xylem's Payment to Jediga"

07) Then fly to Thunder Bluff..

08) Turn in "Delivery to Magatha" (on Elder Rise) ... accept "Magatha's Payment to Jediga"

09) Hearth to Orgrimmar.

10) Go turn in "Rise of the Silithid" ... accept "March of the Silithid" (at 55.47)

11) Turn in "Delivery to Jes'rimon" (at 51.34) ... accept "Jes'rimon's Payment to Jediga" and "Bone-Bladed Weapons"

12) Then turn in "Ripple Delivery" (at 55.35)

13) Then I go get new hunter spells/abilities ... accept "The Hunter's Charm" (if your a Hunter)

14) Then go to The Undercity, head to the Apothecarium Quarter...

15) Turn in "Delivery to Andron Gant" ... accept "Andron's Payment to Jediga"

16) Then turn in "Seeping Corruption" and "Return to Apothecary Zinge" ... accept "Vivian Lagrave"

17) Then accept "Seeping Corruption" ... then turn it in (at the tauren right next to him) ...

18) ... Then complete "Seeping Corruption" for the final time.

19) Then accept "A Sample of Slime..." and "... and a Batch of Ooze"

20) Then fly to Raventusk Village (Hinterlands)...

See Full Video:      High Quality  |  Low Quality

50-50 Hinterlands

01) Accept: "Snapjaws, Mon!" "Gammerita, Mon!" (Elite) and "Lard Lost His Lunch"

02) Stable cat.

03) Go tame a Saltwater Snapjaw (for Bite Rank7) ... then abandon, get cat back out.

04) Go do in the following order:

05) "Snapjaws, Mon!" along with "Gammerita, Mon!"

06) "Cortello's Riddle" (at 81.47, little chest in the water, 14 slot bag along with 6100 XP)

07) "Lard Lost His Lunch" (at 84.42)

08) Then go turn in "Snapjaws, Mon!" "Gammerita, Mon!" and "Lard Lost His Lunch"

09) Then go do "Sprinkle's Secret Ingredient" (at 41.60)

10) Then hearth to Orgrimmar.

11) Fly to Azshara.

12) Turn in all 4 delivery quests.

13) Fly to XRs.

14) Make XRs your home.

15) Fly to Ratchet.

16) Pick up the "Stone Circle" at Liv Rizzlefix shop ... also accept "Volcanic Activity" while your there.

17) Get on the boat to go to BB

18) Fly to Stonard (swamp of sorrows)..

19) Go into Blasted Lands...


See Full Video:      High Quality  |  Low Quality

50-51 Blasted Lands

01) I then find all the items to complete these 5 quests:

02) "A Boar's Vitality"

03) "Snickerfang Jowls"

04) "The Basilisk's Bite"

05) "The Decisive Striker"

06) "Vulture's Vigor"

07) You need to find these many items to complete those quests:

08) Vulture Gizzards =14

09) Basilisk Brain =11

10) Blasted Boar Lungs =6

11) Scorpok Pincers =6

12) Snickerfang Jowls =5

13) While I'm in Blasted Lands, I discover most of all the areas for XP.

14) If an "Imperfect Draenethyst Fragment" drops turn in for this quest: "Everything Counts In Large Amounts"

15) NOTE: I have NEVER found a "Flawless Draenethyst Sphere" for the quest "To Serve Kum'isha" ..good luck on that.

16) Turn in all quests.

17) I turn in "The Decisive Striker" in ASAP for Ground Scorpok Assay (+50 to agility), so I can use the extra +50 agility boost while in the Blasted Lands.

18) Then hearth to XRs.

19) Fly to Tanaris

20) Turn in "Sprinkle's Secret Ingredient" ... accept "Delivery for Marin"

21) Turn in "March of the Silithid" ... accept "Bungle in the Jungle"

22) Turn in "Delivery for Marin" ...accept "Noggenfogger Elixir" then turn it in.

23) Go turn in "The Stone Circle" (at 52.46 in Tanaris)

24) Then go into Un'Goro Crater...


See Full Video:      High Quality  |  Low Quality


51-52 Un'Goro Crater

01) Go accept: "The Apes of Un'Goro" and "The Fare of Lar'korwi" (at 69.77)

02) Go do "The Fare of Lar'korwi" (at 68.56)

03) Then go start doing: "Super Sticky" until this item drops "A Mangled Journal"

04) Then go into Marshal's Refuge, accept ALL quests there.

05) Turn in "Williden's Journal"

06) Then go do the Ungoro Grind :) ...

07) NOTE: don�t worry about the ungoro dirt mounds, you'll find enough soil from mob drops.

08) Find 7 crystals of each color (red, blue, green, and yellow for the "Crystals of Power" quest)

09) "Super Sticky"

10) "The Apes of Un'Goro" along with "Chasing A-Me 01" (if you have a mithril casing do the escort)

11) "Larion and Muigin"

12) "Beware of Pterrordax"

13) "Roll the Bones"

14) "Expedition Salvation"

15) "... and a Batch of Ooze" (I make sure I get at least 30 ooze samples)

16) Go turn in "The Apes of Un'Goro" ... accept "The Mighty U'cha"

17) Turn in "The Fare of Lar'korwi" ... accept "The Scent of Lar'korwi"

18) Then go do:

19) "Bone-Bladed Weapons" along with "The Scent of Lar'korwi"

20) "It's a Secret to Everybody" ... click bag under water (at 63.69)

21) Then turn in "The Scent of Lar'korwi" ... accept "The Bait for Lar'korwi"

22) Then go do "Alien Ecology" along with "Bungle in the Jungle"

23) Go accept "Finding the Source" (at 30.51), then do it along with "Volcanic Activity

24) The hotspot path for the quest "Finding the Source" starts at 51,42 and the hot spot is at 50,46  (See Video on where to find the hotspot)

25) "Lost!" Make sure all quests are done before doing this, then...

26) ...This leads back to Marshal's Refuge, Turn in ALL quests there, accept new ones.

27) Then go do (in the following order):

28) "The Northern Pylon" (at 56.13)

29) "The Mighty U'cha"

30) "The Eastern Pylon" (at 77.50)

31) "The Bait for Lar'korwi" (See Video) then turn it in along with "The Mighty U'cha"

32) Go west killing oozes along the way..

33) Turn in "Finding the Source" ... accept "The New Springs"

34) "The Western Pylon" (at 23.58)

35) Go back to Marshal's Refuge killing oozes along the way..

36) Turn in quests. make sure you complete "Making Sense of It" (just talk to the gnome in the cave)

37) Then go to Silithus, go to Cenarion Hold, get FP there.

38) Fly to Tanaris

39) Turn in "Super Sticky" and "Bungle in the Jungle" ... I SKIP "Pawn Captures Queen"

40) Then fly to Thunder Bluff

41) Go to Elder Rise

42) Accept "Un'goro Soil" .. then turn it in ... accept "Morrowgrain Research" .. then turn that in...

43) ...but SKIP the next part (the part that says bring 10 Morrowgrain)

44) Go get new spells/abilities.

45) Hearth to XRs.

46) Then fly to Ratchet..

47) Turn in "Volcanic Activity" and "Marvon's Workshop" - I SKIP "Zapper Fuel"

48) Get on the boat to go to BB..

49) Fly to Kargath (Badlands)..

50) Turn in "Vivian Lagrave"

51) Accept: "Dreadmaul Rock" and "The Rise of the Machines"

52) Then fly to Burning Steppes...

See Full Video:      High Quality  |  Low Quality


52-53 Burning Steppes

01) Accept: "Broodling Essence" and "Tablet of the Seven"

02) Then go do:

03) "Broodling Essence" (also kill as many dragon whelps you see, their "squishy" mobs that die real fast)

04) "Dreadmaul Rock" ... then "Krom'Grul" (Krom'Grul has 2 different spawn points, in either cave)

05) "Tablet of the Seven" (it's at around 54.40)

06) "The Rise of the Machines"

07) Go turn in "Tablet of the Seven" and "Broodling Essence" ... accept "Felnok Steelspring"

08) Then fly to Kargath (Badlands)

09) Turn in "Krom'Grul"

10) Turn in "The Rise of the Machines" ... accept "The Rise of the Machines" part2

11) Go turn in "The Rise of the Machines" part2 (at around 25.46 in the Badlands)

12) Then hearth to XRs.

13) Then fly to Orgrimmar.

14) Make Orgrimmar your home.

15) Fly to Azshara...

See Full Video:      High Quality  |  Low Quality

53-54 Azshara

01) Accept "Betrayed"

02) Go turn in "The Hunter's Charm" (this is a hunter only quest, at 41.42) ... accept "Courser Antlers"

03) Go accept "Kim'jael Indeed!" (at 52.22 on top of the hill)

04) Then go do:

05) "Courser Antlers"

06) "Betrayed"

07) "Kim'jael Indeed!"

08) NOTE: I grind away at bloodelfs for a while doing those 2 quests.

09) Once those 3 quests are done, go turn in "Kim'jael Indeed!" ... accept "Kim'jael's "Missing" Equipment"

10) Turn in "Courser Antlers" ... accept "Wavethrashing"

11) Then go do:

12) "Kim'jael's "Missing" Equipment"

13) "Wavethrashing"

14) Once both are done, Hearth to Orgrimmar.

15) Then Fly to Azshara..

16) Turn in "Betrayed" ... accept "Betrayed"

17) Turn in "Wavethrashing" ... I SKIP "The Green Drake"

18) Turn in "Kim'jael's "Missing" Equipment"

19) At this point im usually about 3/4th the way to lvl 54, I grind my way to level 54 on BloodElfs.

20) I grind bloodelfs, cause their "squishy" mobs (mobs that have 30% fewer health/armor, than the average mob that level).  I used to grind satyrs on previous speed runs, but I was able to cut off almost a whole hour with the blood elfs.

21) OPTIONAL: Instead of the grinding you could go do BRD instance instead.

22) Once I hit 54 (or a few bars past it), I then hearth to Orgrimmar.

23) I then go turn in "Bone-Bladed Weapons" and "Betrayed"

24) Then fly to Splintertree Post (Ashenvale)..

25) Then go into Felwood...

See Full Video:      High Quality  |  Low Quality

54-54 Felwood

01) Go accept "Forces of Jaedenar" "Verifying the Corruption" (Elite) (at 50.81)

02) Go accept "Cleansing Felwood" (at 46.84)

03) I start killing oozes, I make sure I kill 30-40 oozes here total for the quest "A Sample of Slime..."

04) Then go complete "Forces of Jaedenar"

05) Then go to BloodVenom Post

06) Accept: "Well of Corruption" "A Husband's Last Battle" "Wild Guardians"

07) Get FP there.

08) Then go do in the following order:

09) "Verifying the Corruption" (Elite)

10) "Cleansing Felwood"

11) "The Strength of Corruption"

12) Go accept "Deadwood of the North" (at 64.8) but DONT do it now.

13) Grind your way through the cave to go to Winterspring...


See Full Video:      High Quality  |  Low Quality


54-55 Winterspring

01) Exit the cave and accept "Winterfall Activity" right outside of it.

02) Go to Donova Snowden (at 31.46)

03) Turn in "The New Springs" and "It's a Secret to Everybody" ... accept "Strange Sources" and "Threat of the Winterfall"

04) NOTE: I SKIP "The Videre Elixir" and the rest of that chain.

05) Go to Everlook..

06) Accept: "Are We There, Yeti?" "The Everlook Report" "Duke Nicholas Zverenhoff" "Sister Pamela"

07) Turn in "Felnok Steelspring" ... accept "Chillwind Horns"

08) Make Everlook your home.

09) Go Discover Darkwhisper Gorge for the quest "Strange Sources"

10) Then hearth back to Everlook.

11) Then go do the following quests:

12) "Are We There, Yeti?"

13) "Threat of the Winterfall" you should find "Empty Firewater Flask" which starts "Winterfall Firewater" while doing this quest.

14) "Wild Guardians"

15) "Chillwind Horns"

16) Once "Threat of the Winterfall" and "Winterfall Firewater" is completed go turn them in ... accept "Falling to Corruption"

17) Once the rest of those quests are complete, go back to Everlook and...

18) ...Turn in all quests, accept new ones (Except i SKIP "Return to Tinkee")

19) Then go do:

20) "Winterfall Activity"

21) "Are We There, Yeti?" (find 2 Pristine Yeti Horns)

22) Then hearth to Everlook..

23) Go turn in "Are We There, Yeti?" ... accept "Are We There, Yeti?" part3

24) Go scare Legacki with the mechanical yeti for the quest "Are We There, Yeti?" part3

25) Then fly to Felwood...


See Full Video:      High Quality  |  Low Quality


55-55 Felwood

01) Turn in "Wild Guardians" ... accept "Wild Guardians" part2

02) Go turn in "Cleansing Felwood" ... then get a cenarion beacon for the quest "Salve Via Hunting"

03) Go turn in "Verifying the Corruption" and "Forces of Jaedenar" ... accept "Collection of the Corrupt Water"

04) Go do in the following order:

05) "A Husband's Last Battle"

06) "Well of Corruption" collect 6 "Corrupted Soul Shard" for the quest "Salve Via Hunting"

07) "Collection of the Corrupt Water"

08) Then go to Bloodvenom Post

09) Turn in "A Husband's Last Battle" and "Well of Corruption" ... accept "Corrupted Sabers"

10) Go turn in "Salve Via Hunting" (the 6 Corrupted Soul Shards)

11) Go turn in "Collection of the Corrupt Water" ... I SKIP "Seeking Spiritual Aid"

12) Go do "Corrupted Sabers" then go turn it in.

13) Then go up north and do:

14) "Deadwood of the North"

15) "Falling to Corruption" (hint: I have my pet distract the mobs, while doing this quest)  (See Video) ... then accept "Mystery Goo"

16) Go turn in "Deadwood of the North"

17) Then fight your way through the cave..

18) Turn in "Winterfall Activity"

19) Then go turn in "Mystery Goo" ... I SKIP "Toxic Horrors"

20) Then hearth to Everlook.

21) Fly to Orgrimmar..

22) Make Orgrimmar your home.

23) Fly to Camp Mojache, Feralas.

24) Turn in "The Strength of Corruption"

25) Then fly to Tanaris.

26) Go scare Sprinkle with the mechanical yeti for the quest "Are We There, Yeti?" part3

27) Then fly to Silithus...


See Full Video:      High Quality  |  Low Quality


55-55 Silithus

01) Accept: "Report to General Kirika" "The Twilight Mystery" "Securing the Supply Lines" and "Deadly Desert Venom"

02) Go do: "Securing the Supply Lines" and "Deadly Desert Venom" (do these 2 quests northeast of Cenarion Hold)

03) Then turn them in and accept new quests.

04) Then go do:

05) "Stepping Up Security"

06) "The Twilight Mystery"

07) Go turn in "Report to General Kirika" at 50.69 ... accept "Scouring the Desert"

08) Go do "Noggle's Last Hope" along with "Scouring the Desert" Once you find the Silithyst item which looks like a glowing red thing, bring it back to the PVP horde base and stand in the teleporter looking thing, then turn the quest in for 6,600 XP!

09) "Wanted - Deathclasp, Terror of the Sands" (Elite) This quest is very easy to solo at lvl 55 (See Video).  If your class has troubles, either find a group to help, or you can simply skip it.

10) Once all of those are done, go turn them in at Cenarion Hold, accept new ones.

11) Go do: "Noggle's Lost Satchel" (it's at around 40.90)  (See Video)

12) "The Deserter" (he's in the cave at 67.71) ... i SKIP "The Twilight Lexicon"

13) Then I die on purpose, so I end up at Cenarion Hold.

14) Turn in "Noggle's Lost Satchel"

15) Then go to Marshal's Refuge in Un'Goro Crater.

16) Go scare Quixxil with the mechanical yeti for the quest "Are We There, Yeti?" part3

17) Then hearth to Orgrimmar.

18) Go to the Under City.

19) Go complete "A Sample of Slime..." and "... and a Batch of Ooze"

20) Go accept "A Call To Arms: The Plaguelands!"

21) Make Under City your home.

22) Go to the Bulwark... (which is a small village east of Tirisfal Glades)


See Full Video:      High Quality  |  Low Quality


55-56 Western Plaguelands

01) Turn in "A Call To Arms: The Plaguelands!" accept "Scarlet Diversions"...

02) ... (make sure you get a Flame in a Bottle first, before doing this quest, it's in the box)

03) Turn in "The Everlook Report"

04) Accept and complete "Argent Dawn Commission"

05) Accept "The So-Called Mark of the Lightbringer" and "A Plague Upon Thee"

06) Go into the Western Plaguelands (Felstone field at 38.55) and...

07) Accept "Better Late Than Never" (the lady in the house)

08) Then go to the barn next door, and...

09) Complete "Better Late Than Never" .. click on the chest again to accept "Better Late Than Never" again.

10) Go do "Scarlet Diversions" (burn the tent down, and plant the banner)  (See Video)

11) Go back to the Bulwark..

12) Turn in "Scarlet Diversions" ... accept "All Along the Watchtowers" (Elite)

13) Accept "The Scourge Cauldrons"

14) Go complete the whole Cauldron quest chain...

15) "Target: Felstone Field"

16) "Target: Dalson's Tears"

17) "Target: Writhing Haunt" (while your there accept "The Wildlife Suffers Too" (at 54.65, the almost dead tauren)

18) "Target: Gahrron's Withering"

19) Just keep going back and forth completing each one.

20) Then go accept and complete "Mission Accomplished!"

21) Then head into Eastern Plaguelands...


See Full Video:      High Quality  |  Low Quality

56-57 Eastern Plaguelands

01) Go accept: "Demon Dogs" "Blood Tinged Skies" and "Carrion Grubbage" (at 6.44)

02) Grind your way to (26.75) and accept: "To Kill With Purpose" and "Un-Life's Little Annoyances"

03) NOTE: I SKIP "The Ranger Lord's Behest"

04) Grind your way to Darrowshire (36.92) doing these quests:

05) "Demon Dogs"

06) "Blood Tinged Skies"

07) "Carrion Grubbage"

08) Then turn in "Sister Pamela" ... accept and do "Pamela's Doll" (there's 3 parts of the doll)  (See Video)

09) Turn in "Pamela's Doll" ... accept "Auntie Marlene" and "Uncle Carlin"

10) Then go complete "Blood Tinged Skies"

11) Then make sure you kill 20 Plaguehound Runts for the quest "Demon Dogs"

12) Then go to Light's Hope Chapel (at 81.60)

13) Accept: "Zaeldarr the Outcast" and "The Restless Souls"

14) Turn in "Duke Nicholas Zverenhoff" and "Uncle Carlin" ... accept "Defenders of Darrowshire"

15) Get FP there.

16) Then go do:

17) "To Kill With Purpose"

18) "Defenders of Darrowshire"

19) "Demon Dogs"

20) "Carrion Grubbage"

21) "Un-Life's Little Annoyances"

22) "A Plague Upon Thee"

23) "Augustus' Receipt Book" (get this quest in the hut at 13.34, the book is upstairs in the inn at 15.33)

24) "The Restless Souls" (Egan is in the hut at 13.34)

25) Then go turn in: "Augustus' Receipt Book"

26) Go through the cave (watch out for the elite spider) and then turn in "Demon Dogs" "Blood Tinged Skies" and "Carrion Grubbage"  accept "Redemption"  ... Just talk to the guy to complete it ... I SKIP "Of Forgotten Memories" (you can try it if you find a group)

27) Then go turn in: "To Kill With Purpose" and "Un-Life's Little Annoyances"

28) Then go do "Zaeldarr the Outcast" (See Video)

29) Then turn in: "Zaeldarr the Outcast" and "Defenders of Darrowshire"

30) Hearth to Under City..

31) Turn in "Better Late Than Never" ... accept "The Jeremiah Blues"

32) Turn in "The Jeremiah Blues" (just right underneath the bank) ... accept "Good Luck Charm"

33) Go back to the Bulwark...

See Full Video:      High Quality  |  Low Quality

57-58 Western Plaguelands

01) Turn in "A Plague Upon Thee" ... accept "A Plague Upon Thee" part2

02) Go turn in "Good Luck Charm" ...accept "Two Halves Become One"

03) Do "Two Halves Become One" (just kill a jabbering ghoul out in Felstone Field), then turn it in.

04) Then do "A Plague Upon Thee" part2 ... accept "A Plague Upon Thee" part3 (this is all done at 46.32)  (See Video)

05) Then go accept "Unfinished Business" part1, then do it. (the mobs for this quest are at 50.42 and 53.44)

06) Turn in "Unfinished Business" part1 ... accept "Unfinished Business" part2, then go do it. The 2 mobs for this quest are at (57.37 and 54.24).  While doing this quest make sure you do "The So-Called Mark of the Lightbringer" along with it, it's up in the top of the tower at 54.23)

07) Turn in "Unfinished Business" part2 ... accept "Unfinished Business" part3, then go do it. Need to go up in the tower (at 45.19) in a certain spot, watch out for Elites.  (See Video)

08) Then turn in "Unfinished Business" part3

09) Then go complete and turn in "The Wildlife Suffers Too" ... accept  "The Wildlife Suffers Too" part2

10) Do "The Wildlife Suffers Too" part2, then turn it in ... accept "Glyphed Oaken Branch"

11) Go turn in "Auntie Marlene" (at 48.78)  ...accept "A Strange Historian"

12) Go do "A Strange Historian" (the ring is out in the graveyard)  (See Video)

13) Go into Andorhal..

14) Do "All Along the Watchtowers" (Elite) while working your way to the inn (at 39.68)

15) Turn in "A Strange Historian" (at Chromie) ... accept "The Annals of Darrowshire" and "A Matter of Time"

16) Then go do (while grinding away at mobs):

17) "All Along the Watchtowers" (Elite)

18) "A Matter of Time" (See Video)

19)"The Annals of Darrowshire" the book for this is in the building at (42.67), the actual Annals of Darrowshire book looks different from the others, it has a lighter tint on the top portion of the pages in the book, unlike the rest which has a darker tint on the top portion of the pages.  (See Video)

20) Go turn in "A Matter of Time" and "The Annals of Darrowshire" ... accept

21) "Counting Out Time" ... I SKIP "Brother Carlin" (you can still accept it though)

22) Go do "Counting Out Time" then turn it in. (it's repeatable but you only get XP once from it)

23) I then keep grinding away at mobs in Andorhal till I'm Friendly with the Argent Dawn, so I'm able to buy Enriched Manna Biscuits (which replenish mana faster from drinking)

24) As soon as I hit Friendly with AD, I then go back to the Bulwark..

25) Turn in "A Plague Upon Thee" part3 and "The So-Called Mark of the Lightbringer" ... I skip "Defiling Uther's Tomb"

26) Turn in "All Along the Watchtowers" ... accept "Scholomance"

27) Turn in "Scholomance" at the undead guy right next to him ... accept "Skeletal Fragments"

28) I then go back to Andorhal, and grind all the way to level 58, while doing "Skeletal Fragments" quest.

29) As soon as I hit 58, then go back to the Bulwark and turn in "Skeletal Fragments" .. I SKIP "Mold Rhymes With..."

30) I turn in any scourge stones, I have.

31) I then stock up on Enriched Manna Biscuits (i buy about 600 biscuits)

32) Then go get on the zeppelin to go to Orgrimmar. (while waiting, make heavy runecloth bandages)

33) Once in Orgrimmar I get new spells/abilities.

34) Bank 2/3rd of my manna biscuits.

35) Then fly to Winterspring...

See Full Video:      High Quality  |  Low Quality

58-60 Winterspring

01) First thing I do here is stable my pet.

02) Then make Everlook your home.

03) Turn in "Are We There, Yeti?" part3

04) Accept: "Luck Be With You" (Elite) and "Ursius of the Shardtooth" (Elite)

05) Then go tame a Winterspring Screecher (for Claw Rank8) (head south to do this)

06) Then use that pet to do "Luck Be With You" (just use your pet to distract the giants while picking up the Frostmaul Shards)

07) Then hearth to Everlook.

08) Go do "Ursius of the Shardtooth" (Elite) (just keep grinding mobs on the hill north of everlook till Ursius shows up)

09) Go turn in "Luck Be With You" (if it's done yet) and "Ursius of the Shardtooth" ... accept "Brumeran of the Chillwind" (Elite)

10) Then go south and do:

11) "Brumeran of the Chillwind" (Elite)

12) "Luck Be With You" (Elite) (if you still need to finish it up)

13) "Wild Guardians" part2 (i grind away at owls at the Owl Wing Thicket for a few hours, before leaving here)

14) Then when I'm a few bars away from 59, I go back up to Everlook (DONT hearth)..

15) Turn in "Luck Be With You" and "Brumeran of the Chillwind" ... I SKIP "Shy-Rotam" (Elite)

16) Fly to Bloodvenom Post (Felwood)..

17) Turn in "Wild Guardians" part2 ... accept "Wild Guardians" part3

18) Then hearth back to Everlook.

19) Then go down to the Owl Wing Thicket and do "Wild Guardians" part3

20) I keep grinding away at Owls till I'm about 59 and a half, then...

21) I die on purpose, so I end up at Everlook (don�t hearth)

22) Then Fly to Bloodvenom Post (Felwood)..

23) Turn in "Wild Guardians" part3 and "Guarding Secrets" ... accept "Guarding Secrets" part2

24) I then fly to Thunderbluff, go to Elder Rise..

25) Turn in "Guarding Secrets" part2 and "Glyphed Oaken Branch" (both at Nara Wildmane)

26) Hearth back to Everlook.

27) At this point I'm usually about 3/4 way to 60.

28) I then go back down to the Owl Wing Thicket and Grind to 60.  (See End Game Credits)

See Full Video:      High Quality  |  Low Quality  (Levels 58-59)
See Full Video:      High Quality  |  Low Quality  (Levels 59-60)
(See this Video [59-60] on how I do the Owl Grind.)


Tips/tricks that will help you level faster:


1. If your goal is to level really fast, then your gonna have to stop worrying about professions, they will slow you down if anything. The only profession I use is First Aid.


2. Always make sure you have the latest up to date food/drink, regenerating mana/life faster from eating/drinking is VERY important to leveling faster. So as soon as you hit 15/25/35/45, upgrade your food/water immediately.


3. I strategically use hearth stones through out the whole game, if you have to hearth and there still is a cooldown, then logging out of the game, will still make the cooldown tick. This will help you get a better /played time at the end.


4. Practice makes perfect, I can�t stress this enough, the more times you go through the game to 60, the faster you get at it, it's as simple as that.


5. Plan ahead. While questing, always know what your going to do next.


6. Use Auto-Run a lot, you can still type and do other stuff while auto-running.


7. If your goal is to get a VERY good /played time to 60, then NEVER do BGs, NEVER go to the AH (see below), NEVER go AFK, NEVER go to the ARENA in STV.


8. You should always have a bank/AH alt on every server you have a main character on. This is VERY important. I consistently use the mail system as a "bank", Any time im out questing and find a bunch of greens or items that will sell in the AH, I DO NOT go to the AH with that character to put it in the AH, instead I send them all to an ALT through the mailbox. Then with the ALT, ill put them in the AH. Also, I strategically use the mail box as a "storage system". For example, I have a bunch of Silk Cloth in my inventory, that im going to use later, but not now, instead of it wasting space in my inventory, ill send it to my ALT, then from my ALT, ill send it right back to my main, so it sits in my mailbox, when I need it.


9. Before I go out questing, I make sure I have plenty of food/water/bullets or arrows/and repaired, so I can last hours before returning to town.


10.  Don�t think just because your inventory is filled you have to go back to town to empty it every time, I consistently destroy items to make room for quest items or items that are more important.


11. Use the new built in auto loot feature that has been implemented in patch 2.0!  This can speed up leveling a lot, since you won't have to manually loot every corpse.  To enable this, go to Interface Options, then put a check next to "Auto Loot Corpse".  I am finally glad they implemented this!


12. Don�t loot every mob! If your goal is to level like a madman, then don�t loot mobs that would waste too much time. Although the higher the level I get the more percent chance that I will loot mobs. here's a rough estimate of whether I loot mobs or not:


lvl    -  % chance to loot

1-10 - 97%  I loot more here cause I don�t have a pet yet, so the mob drops dead right where im at each time.

10-20 - 70%

20-30 - 80%

30-40 - 87%

40-50 - 95%

50-60 - 98%


How do I determine whether or not I loot?  Many factors comes in to play here, like if my inventory is full or not, or how much time it would take to go loot a mob then continue on, or if it's a beast type mob (which don�t drop cloth/money).


13. Many people have asked me if instances are a waste of time. No, they are worth doing, but only if you have a good group to do them. I personally skip instances while racing myself to 60, cause I don�t want to take the chance that I will have a bad group. But if your just playing casually, then I recommend doing them.


14. If your goal is to level real fast then stick with one type of weapon the whole game. I choose to stick with staves the WHOLE game, even if I find an epic whatever, I stick with staffs, cause it slows you down when you have to level up new weapons. Plus, I get staff quest rewards along the way.  Although if you refuse this tip, then if you want to level up a new weapon faster, you can use your abilities (which counts as extra weapon hits), such as disengage/raptor strike/Mongoose Bite/Wing Clip for melee weapons, which will help level up your weapons faster.


15. from my experience gear is overrated, people think gear is too important for everything (even leveling faster).  Well, from my experience it's not that important, your character does most of it's damage from it's actual character level and its skills/abilities and your pet's damage (if your a hunter), and from better bullets/arrows/scopes.  I could use a low level green bow/gun all the way to 60, or a high level epic bow/gun all the way to 60, and I betcha my final /played time will hardly be no difference at all.  So don't panic if your stuck with a lower level green for awhile. As a matter of fact, on Jubei'Thos server (the server I finished with a final time of 4 days 20 hours), I used a level 36 green bow all the way to level 57, I then found a level 50 green gun at level 57 that I used to 60. Through out all my speed runs I never buy weapons/armor in the AH to use, I save my money so I have enough to buy a mount (which I usually am able to afford at level 45), you�ll find sufficient weapon/armor from mob drops and quest rewards. The only thing I do buy from the auction hall is scopes, better bags, better ammo/arrow bags, and maybe a better bow/gun, that�s it.


16. I get asked a lot why I choose troll rather than orc for a hunter. The racial bonuses between orc and troll are pretty much an even choice so it came down to looks for me. Although I do believe the troll beserking ability can be a life saver, but the orc�s 5% pet damage is not really much of a life saver.


17. Avoid grinding as much as possible, if you want to get to 60 faster, easier, and with less boredom, then learn to do the quests instead. I actually spend a lot of time flying/riding around turning in quests or moving to the next area (which is still faster than grinding). And while doing all that flying, I take breaks to eat (in RL) or whatever. If your grinding, you have to be there non-stop. Not to mention, questing increases your reputations a lot, compared to grinding, which hardly doesn�t at all. Questing is the way to play this game, not grinding.


18. Turn off auto camera and use your mouse to manually adjust your vision. Also crank up your mouse sensitivity high, so you can look around much faster.


19. This is the exact order I distribute my skill points as a hunter, this is a VERY good PvE Leveling build:


10) Endurance Training rank  1/5
11) Endurance Training rank  2/5
12) Improved Aspect of the Hawk rank  1/5
13) Improved Aspect of the Hawk rank  2/5
14) Improved Aspect of the Hawk rank  3/5
15) Improved Revive Pet rank  1/2
16) Improved Revive Pet rank  2/2
17) Thick Hide rank  1/3
18) Thick Hide rank  2/3
19) Thick Hide rank  3/3
20) Pathfinding rank  1/2
21) Pathfinding rank  2/2
22) Bestial Swiftness rank  1/1
23) Unleashed Fury rank  1/5
24) Unleashed Fury rank  2/5
25) Ferocity rank  1/5
26) Ferocity rank  2/5
27) Ferocity rank  3/5
28) Ferocity rank  4/5
29) Ferocity rank  5/5
30) Intimidation rank  1/1
31) Bestial Discipline rank  1/2
32) Bestial Discipline rank  2/2
33) Unleashed Fury rank  3/5
34) Unleashed Fury rank  4/5
35) Frenzy rank  1/5
36) Frenzy rank  2/5
37) Frenzy rank  3/5
38) Unleashed Fury rank  5/5
39) Frenzy rank  4/5
40) Bestial Wrath rank  1/1
41) Improved Aspect of the Hawk rank  4/5
42) Improved Aspect of the Hawk rank  5/5
43) Catlike Reflexes rank  1/3
44) Catlike Reflexes rank  2/3
45) Serpent's Swiftness rank  1/5
46) Serpent's Swiftness rank  2/5
47) Serpent's Swiftness rank  3/5
48) Serpent's Swiftness rank  4/5
49) Serpent's Swiftness rank  5/5
50) The Beast Within rank  1/1
51) Lethal Shots rank  1/5
52) Lethal Shots rank  2/5
53) Lethal Shots rank  3/5
54) Lethal Shots rank  4/5
55) Lethal Shots rank  5/5
56) Efficiency rank  1/5
57) Efficiency rank  2/5
58) Efficiency rank  3/5
59) Efficiency rank  4/5
60) Efficiency rank  5/5
*******Burning Crusade 60-70*******
61) Go for the Throat rank  1/2
62) Go for the Throat rank  2/2
63) Rapid Killing  1/2
64) Rapid Killing  2/2
65) Aimed Shot  1/1
66) Mortal Shots  1/5
67) Mortal Shots  2/5
68) Mortal Shots  3/5
69) Mortal Shots  4/5
70) Mortal Shots  5/5

Click Here To See My Full Completed Talent Build At Level 60!  And...  At Level 70!

20. Here are the times I had for each level during my 4 day 20 hour run on Jubei'Thos:


DAYS:HOURS:MINUTES
LVL - Time - Time to do LVL
10    = 0:02:32
12    = 0:03:50
12.9 = 0:05:13 <->0:55
15.9 = 0:06:34 <->0:42
16.9 = 0:07:34 <->1:00
17.9 = 0:08:17 <->0:43
18.9 = 0:09:12 <->0:55
19.9 = 0:10:09 <->0:56
20.9 = 0:11:21 <->1:11
21.9 = 0:12:49 <->1:28
22.9 = 0:14:10 <->1:20
23.9 = 0:15:20 <->1:10
24.9 = 0:16:41 <->1:22
25.9 = 0:17:55 <->1:13
26.9 = 0:19:15 <->1:20
27.9 = 0:20:55 <->1:40
28.9 = 0:22:39 <->1:44
29.9 = 1:00:20 <->1:41
30.9 = 1:02:12 <->1:53
31.9 = 1:04:12 <->2:00
32.9 = 1:06:07 <->1:54
33.9 = 1:08:13 <->2:06
34.9 = 1:10:21 <->2:08
35.9 = 1:12:02 <->1:41
36.9 = 1:14:39 <->2:37
37.9 = 1:16:55 <->2:16
38.9 = 1:19:27 <->2:32
39.9 = 1:22:04 <->2:36
40.9 = 2:01:06 <->2:02
41.9 = 2:04:23 <->3:16
42.9 = 2:07:22 <->2:59
43.9 = 2:10:25 <->3:04
44.9 = 2:12:50 <->2:24
45.9 = 2:15:30 <->2:40
46.9 = 2:19:17 <->3:49
47.9 = 2:22:11 <->2:54
48.9 = 3:01:17 <->3:07
49.9 = 3:04:26 <->3:09
50.9 = 3:07:27 <->3:00
51.9 = 3:11:28 <->4:01
52.9 = 3:14:07 <->2:38
53.9 = 3:17:45 <->3:38
54.9 = 3:22:20 <->4:34
55.9 = 4:02:06 <->3:46
56.9 = 4:05:38 <->2:32
57.9 = 4:09:36 <->3:57
58.9 = 4:15:09 <->5:33
59.9 = 4:20:49 <->5:39

1-70 Speed runs coming SOON!

Hunter specific tips/tricks::


1. before taming a pet, lay down a frost trap, so the mob freezes solid for a while, instead of having it hit you repeatedly.


2. while drinking, have your pet start attacking something.


3. Learn to use immolation traps a lot. One method I use through out the whole game is:  lay down an immolation trap, then serpent sting a mob, have that mob run into the immolation trap, while that mob is taking damage and im tanking it, me and my pet are killing another mob.


4. If a mob has the ability to heal them self, use Intimidation to stop them from healing. (Or scatter-shot if your MM speced)


5. Use a macro to feed your pet, this saves time and frustration.


6. consistently use all your hunter's abilities, use BW/Rapid Fire/Arcane Shot, as soon as the cooldown is up every time. Use a UI add-on that help you see the cooldowns better (like what I use, which is called Cooldown Count mod).


7. Multi-shot single mobs (or even players in PVP).  Multi-shots adds an extra free shot (similar to arcane shot) in the shoot cycle. Through out the game check and see if your multi-shots are doing more damage per mana than arcane shots, if so, use multi-shots more often (even on single mobs).


8. Use bandages to heal your pets sometimes instead of using mend pet, this saves your mana, and (depending on the bandage) can heal more HPs up.


9. I personally use a cat as my main pet mainly because it does the most DPS out of all pets. Popular pets such as the Rake are no better than a regular cat for PvE, but for PvP it can make a slight difference.


10. Here are the hotkeys I use. I think using hotkeys is more efficient than pressing icons all the time, so here are the hotkeys I use as a hunter:


"Q" Hunter's Mark

"E" Serpent Sting

"3" Arcane Shot

"4" Multi-Shot

"X" Bestial Wrath

"2" Raptor Strike

"Z" Rapid Fire

"5" Viper Sting

"6" Flare

"H" mount

"CTRL+W" Intimidation

"SHIFT+F" Immolation Trap

"SHIFT+C" Aspect of the Cheetah

"SHIFT+R" Aspect of the Hawk

"SHIFT+D" Aspect of the Monkey

"CTRL+1" Disengage

"CTRL+V" Mend Pet

"CTRL+SHIFT+V" Mend Pet (1-2 skill levels below my best)

"CTRL+E" Concussive Shot

"CTRL+2" Wing Clip

"CTRL+3" auto shoot

"CTRL+S" Beserking (troll racial ability)

MOVEMENT COMMANDS:

"W" move forward (I also sometimes hold both mouse buttons down to move forward)

"A" strafe left

"S" move backwards

"D" strafe right

"MIDDLEMOUSEBUTTON" Auto-run

"SPACEBAR" jump


------------------------------------------------------------------------------

Here are my Warlock hotkeys:

"Q" Curse of Agony

"E" Corruption

"SHIFT+F" Siphon Life

"CTRL+F" Immolate

"3" Drain Life

"2" Shadow Bolt

"Z" Life Tap

"CTRL+Q" Curse of Weakness

"SHIFT+G" Summon Imp

"SHIFT+C" Death Coil

"X" Dark Pact

"CTRL+C" Drain Soul

"CTRL+W" Amplify Curse

"CTRL+E" Fear

"CTRL+SHIFT+V" Create Healthstone

"4" Demon Armor

"CTRL+G" Summon Voidwalker

"CTRL+V" Health Funnel

"CTRL+~" Sacrifice

"SHIFT+W" Unending Breath

"CTRL+B" Create Soulstone

"CTRL+A" Searing Pain

"CTRL+1" Rain of Fire

"CTRL+SHIFT+R" Ritual of Summoning

"T" Shadowburn

"G" Summon Succubus

"I" Eye of Kilrogg

"CTRL+3" Drain Mana

"SHIFT+D" Sense Demons

"SHIFT+4" Banish Rank1

"SHIFT+E" Banish Rank2

"CTRL+N" Create Firestone

"CTRL+4" Enslave Demon

"SHIFT+1" Hellfire

"SHIFT+CTRL+G" Summon Felhunter

"CTRL+D" Detect Invisibility

"CTRL+SHIFT+B" Create Spellstone

"CTRL+SHIFT+E" Howl of Terror

"SHIFT+2" Curse of Shadow

"ALT+Q" Curse of Doom

"SHFT+SPACEBAR" Consume Shadows (VW ability)

"TAB" Suffering (VW ability)

"SHIFT+Q" Curse of Recklessness

"5" Curse of Tongues

"CTRL+S" shoot wand

"CTRL+2" Soul Fire

-------------------------------

Abbreviation meanings:  BB=booty bay, FP= flight path, CT=camp Taurajo, XR=cross roads, STV=stranglethorn vale, WC= wailing caverns, SM= scarlet monestary, RFK=razorfen krawl, BRD= blackrock depths


Joana, how long did it take you to come up with these awesome leveling routes?


Good question, I went through 8 different horde characters, racing myself to 60 on new servers with each one, I was the first to 60 every time, but my main goal was not first to 60 but a better /played time with each attempt.  With each race I basically paid very close attention to every little detail on the fastest way to do the quests etc..  Then in-between new servers, I would spend all my time trying to figure out how to do the next server even faster!  I had went through several test characters to find the best grinding spots, figuring out which quests to skip and finding more quests I could do (by looking them up on wow.allakhazam.com or Thottbot.com) Each time improving upon my memorization of everything, I put a LOT of thought in this whole leveling process.  I spent literally about 6 solid months doing nothing but coming up with this leveling pattern you have here.


What UI Mods do I use?


I get asked this a lot!  I use cosmos UI (www.cosmosui.org) but I only use a few mods that come with it, mainly "Cooldown Count" (the mod that shows the cooldowns of my abilities in yellow on the action bar), "Bar Options" (the only reason I use this is for the "out of range coloring" option), "Census Plus" (which allows me to see a whole census of the current faction side of the server, all the players and their levels in nice graphs), "PopBar" (this is the UI mod that allows me to drop spells/abilities/macros in that huge box on the lower right hand side of the screen, I then have all of those hot keyed for easy game play), "Scrolling Combat Text" (SCT) (I turn everything off on this except the "show dodges", this tells me when I can use the Mongoose Bite ability, since you can only do those after dodges), and a few other minor UI mods (such as map coordinates etc.).  I also use a mod I HIGHLY recommend called "AutoProfit", which simply sells all gray items you have in your bags to the vendor at once.


If your into RAIDING you may want to look into other mods that will help you with groups better, you can check out www.curse-gaming.com for all kinds of different UI mods that will help your class or your play style. 

For screenshots and to get to know Joana/Mancow better you can visit this part of my site here!


MORE GUIDES:  To check out more World of Warcraft guides that are decent buys, you can check out Brian's 1-70 Alliance Guide if you need an alliance guide which is somewhat similar to mine,  World Of Warcraft Cash Creating Guide, which is great if you need a gold guide, and also the Ultimate World Of Warcraft Guide, this guide can give you some more pointers on the classes and such.